


You unboxed a home espresso grinder with 45 grind settings — then stared at the dial wondering which click is “espresso” and whether you are supposed to use every step.
This Meraki guide teaches 45 setting espresso grinder how to use the range: where espresso usually lives on a fine-step dial, when to move one click vs several, how to run a taste→adjust loop without chasing every notch, and a week-one practice plan. It is not a rewrite of Is More Always Better? (settings-count myths), app grind settings, humidity and grind, or Meraki’s dose and yield / six-shot bag method dial-in essays. Use those for their jobs; use this page when the dial itself feels overwhelming.
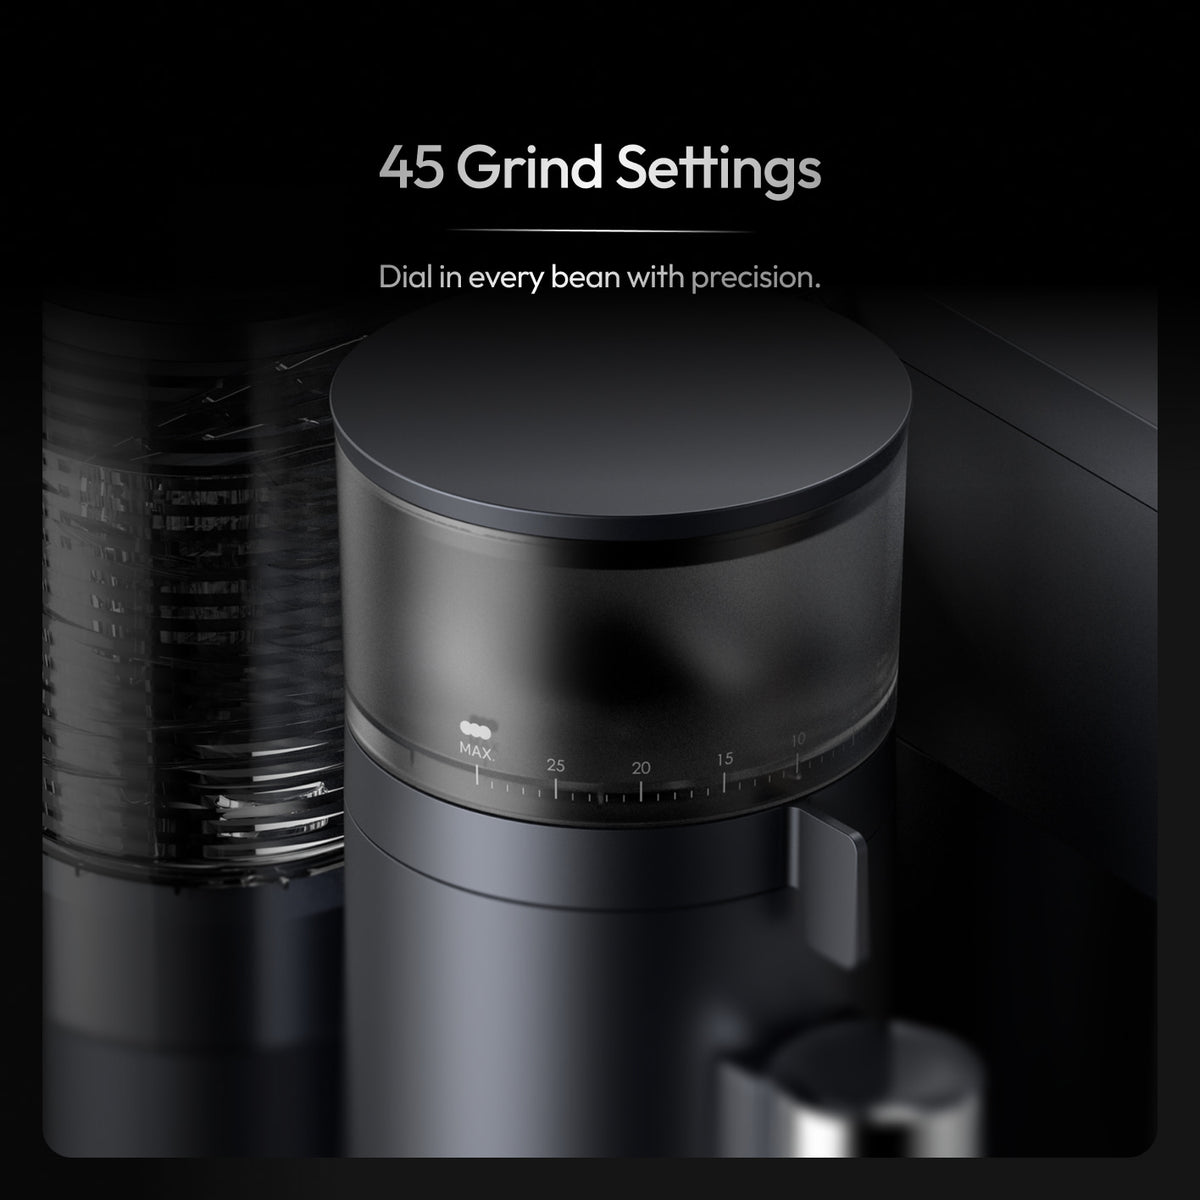
Forty-five labeled steps are a navigation map — learn the espresso zone and the size of each move, not a magic universal click number.
What “45 setting espresso grinder how to use the range” really means for home buyers
“45 setting espresso grinder how to use the range” in search often lands on community threads asking for a single “correct” click, brand-specific Breville/Sage charts, or conversion calculators. For a new owner it means something narrower: how to navigate a fine stepped dial so grind stays the controlled variable while taste and flow tell you which way to turn.
A setting count is not a recipe. It is a ladder of labeled (or detented) positions between coarser and finer particle sizes. Forty-five steps matter only if you know roughly where espresso sits on your machine, how big one click feels in the cup, and when to stop moving. There is no universal “setting 24 for all beans” that transfers across brands — and inventing one here would mislead you.
Treat the keyword as dial literacy first. Myths about whether “more settings are always better” already have a home on Meraki’s settings-count page. This page owns the pedagogy: find the zone, choose move size, taste, adjust, lock a weekday baseline.
Who this page is for (and who should skip it)
This page is for new owners of a stepped home espresso grinder — especially an all-in-one with a built-in mill — who feel overwhelmed by a long dial and want a calm first-week method.
Skip it if you still need the myth answer (“is more always better?”) — start with 45 Setting Espresso Grinder: Is More Always Better?. Skip phone-app profile workflows — that is app grind settings. Skip weather-driven drift — use how humidity changes your espresso grind setting. Skip a full dose/yield triangle or a six-shot bag protocol — those live on dose and yield and the repeatable 6-shot method. Skip decaf-as-a-different-bean — dialing in decaf owns that. Come here when the question is: how do I use this 45-step range without getting lost?
Why this is dial-in pedagogy (not a settings-count myth piece)
Search results for grind settings lean toward “what number for Breville,” forum conversion charts, and short videos that shout one click as gospel. Meraki’s nearest machine-guides page already owns whether a high setting count is valuable. Dose/yield and bag-method pages own full recipe dial-in.
The unique job here is dial-in pedagogy for a fine range: map the espresso neighborhood, choose one-click vs multi-click moves, refuse to chase every notch, run a taste→adjust loop, and practice for seven days until the dial feels boring. Disclosure: Meraki publishes this guide and sells the Meraki Espresso Machine. Live product story (2026-10-26 snapshot + homepage): true burr grinder co-developed with TIMEMORE®, 45 grind settings, grind straight onto the built-in scale (grind-by-weight / grind-to-scale), dual scales 1 kg · ±0.2 g. Meraki examples illustrate one verified path — not a universal click chart for every brand.
Tools and settings to prepare first
Pedagogy fails when three variables move at once. Before you touch the dial for “science,” stage a boring station: fresh beans, clean basket and portafilter, the distribution/tamp tools you actually use, a timer, and a way to weigh dose and yield — Meraki’s built-in dual scales, or a tray scale on a separate station.
Lock one weekday recipe skeleton for the practice week: one dose, one yield target (many homes start near a classic ~1:2 brew ratio as a habit, not a law), and one drink style. Write those numbers on a sticky note. Do not change roast, basket, and dial on the same morning.
Read your quick-start for any “espresso starting zone” language — launch pad, not forever answer. Meraki’s product framing says the 45 settings help you “find the right grind for different beans”; it does not publish one magic click for every bag. Category literacy from the Specialty Coffee Association and CoffeeGeek’s guides beat any viral chart that ignores your burrs and beans.
Step-by-step workflow: navigate the 45-setting range
The weekday win is a readable dial, not a library of unused clicks. Use this order until it feels automatic.
- Warm the machine fully. Grind into a ready group, not a cold one. Meraki’s FAQ framing lists dual-boiler warm-up around 3–4 minutes — confirm on your model’s live product page or manual.
- Pick a starting neighborhood, not a prophecy. On a 45-step dial that spans coarse brew through fine espresso, espresso usually lives toward the finer half of the usable range — still coarse enough to flow, fine enough to resist. Start at the manufacturer’s suggested espresso start if you have one; otherwise start mid-fine and expect to move. Do not memorize a blogger’s click number from a different machine.
- Dose by weight, then pull. Hit your sticky-note dose. On Meraki, grind-to-scale / auto-dose onto the built-in grind scale removes scooping noise from the experiment. Lock, brew, watch flow and time roughly, stop at yield.
- Classify the error in one word. Gushing / blonding early → too coarse. Choking / dripping forever → too fine. Sour-thin under a normal time → often still too coarse or under-extracted. Harsh-bitter / ashy → often too fine or over-extracted. Taste beats the stopwatch when they disagree.
- Choose move size on purpose. - Multi-click (about 2–4 steps) when the shot is obviously broken — gusher or choke — so you escape the wrong neighborhood fast. - One click when the shot is in the ballpark and you are polishing taste or a modest time miss. - No click when distribution, dose, or stale beans are the real problem — turning the dial will not fix an uneven puck.
- Change only grind for the next shot. Keep dose and yield fixed while you learn the dial. If you need a full recipe rebuild, pause this pedagogy page and use Meraki’s dose and yield or 6-shot bag method guides — then return here for dial navigation habits.
- Write the winning click for this bag. Label it with roast name and date. That number is a personal bookmark, not a law for the next bag or for someone else’s Breville.
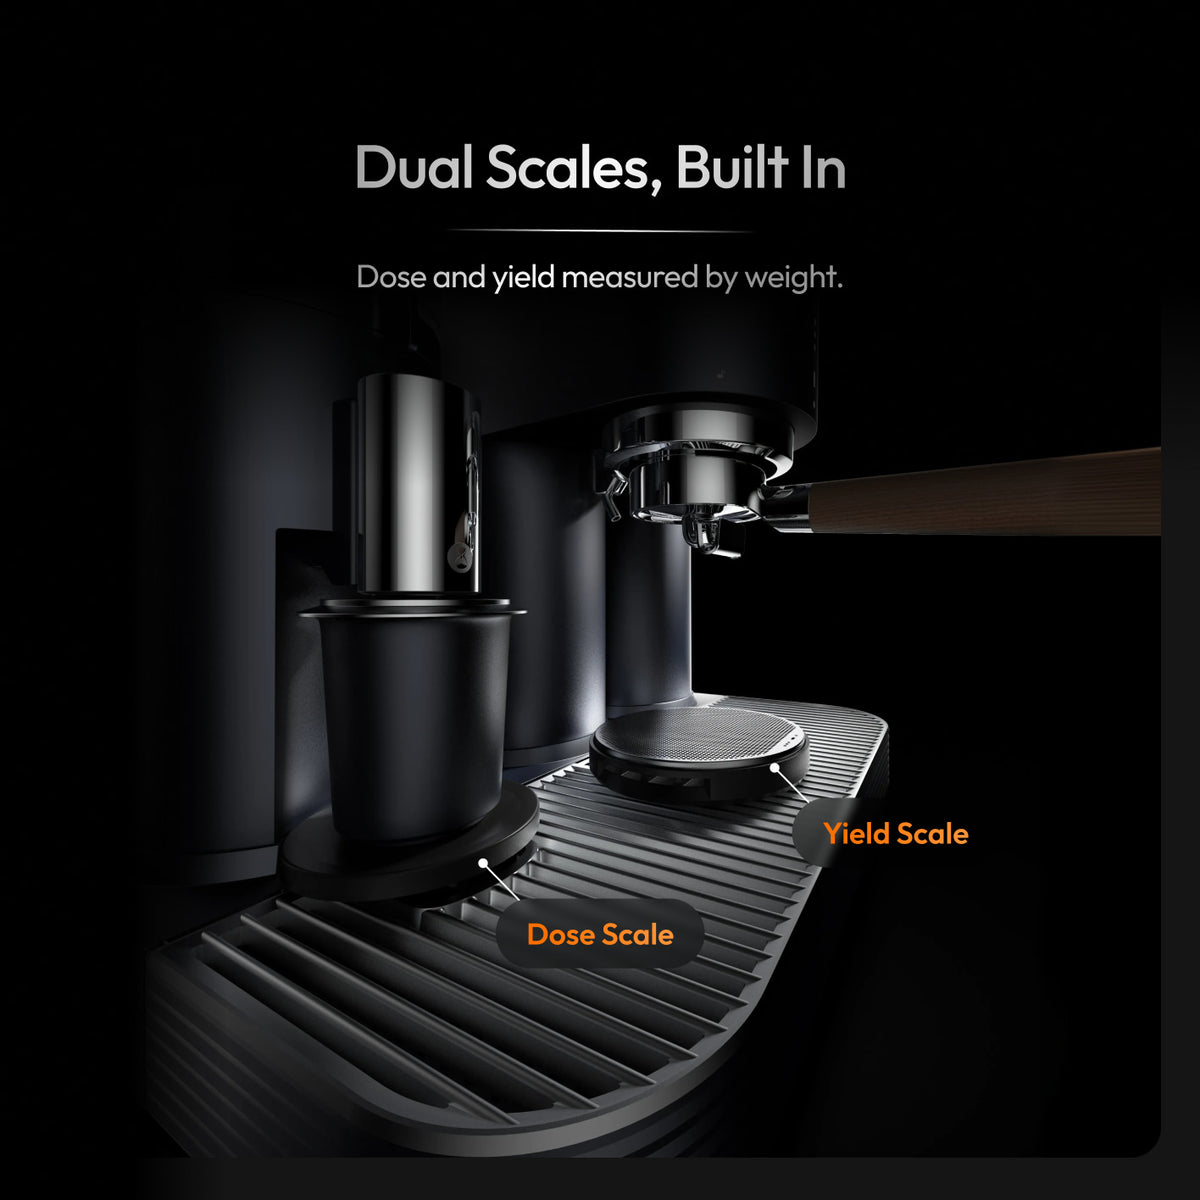
Weigh dose and yield so each click on a 45-setting dial is a fair experiment — not a scoop-and-guess session.
Targets and ranges that keep you out of rabbit holes
Targets exist to stop you from visiting all 45 clicks before breakfast. Prefer ranges and habits, not fake laboratory precision.
Use extraction time only as a traffic light — many home shots settle from the mid-twenties into the low thirties of seconds as a familiar band, not as an SCA commandment. If taste is sweet outside that band, keep the taste. If time looks “perfect” and the cup is harsh or hollow, believe the cup. Brew-ratio literacy from NCA brewing basics and SCA research keeps grind beside dose and yield.
On a fine-step grinder, most households live in a narrow active zone for espresso. You do not owe unused clicks any loyalty. Meraki lists 45 settings and dual scales to ±0.2 g — grams make each click readable; they are not a license to chase hundredths before you can taste sour vs bitter. NIST is a reminder that a scale is a tool with uncertainty. Manufacturer notes such as La Marzocco’s grind-size page stress observation over a single printed number — steal that mindset, not another machine’s click chart.
Common mistakes and quick fixes
Most “45 settings are confusing” complaints are navigation errors, not broken burrs.
| Mistake | What you feel | Quick fix |
|---|---|---|
| Hunting for a universal magic number | Endless forum tabs; no stable cup | Bookmark your bag’s click; re-dial new bags |
| One-click moves on a gusher/choke | Ten shots still wrong | Jump 2–4 clicks to leave the wrong zone |
| Multi-click jumps when taste is close | Oscillating past the sweet spot | Polish with one click, then stop |
| Changing dose, yield, and grind together | No idea what worked | Freeze dose/yield while learning the dial |
| Using every setting “because they exist” | Decision fatigue | Live in the espresso neighborhood only |
| Blaming the dial for channeling | One side blondes; dial keeps moving | Fix distribution/tamp; then revisit grind |
| Copying a Breville/Sage chart onto another mill | Random results | Settings are machine-specific — use the method below |
If humidity or weather is the new variable after a stable week, do not rebuild your pedagogy here — jump to Meraki’s humidity grind guide. If you want phone-saved profiles later, that is the app settings chapter.
How to taste and decide what to change next
The loop is short on purpose: taste → name the defect → pick move size → change grind only → taste again.
Ask before you touch the dial: sour-sharp and thin, or bitter-harsh and drying? Clean finish or muddy? Under milk, does espresso still taste like coffee? Sour-thin with fast flow usually wants finer. Harsh-bitter with a syrupy crawl usually wants coarser. Muddy or hollow with “okay” time often wants distribution or dose discipline first — fix those before spinning the dial for sport.
Keep a three-line note: date, click, one taste word. That beats a spreadsheet in week one. Press context on Meraki’s path appears in places like Barista Magazine; still judge your cup. For decaf nights, use Meraki’s decaf dial-in page instead of forcing yesterday’s regular-bean click.
A one-week practice or habit plan
A week installs dial literacy without turning coffee into homework. Keep the same beans and the same drink.
- Day 1 — Find the neighborhood. From a mid-fine start (or the manual’s espresso start), use multi-click jumps until flow is neither gusher nor choke. Write the click.
- Day 2 — One-click polish. Same dose and yield. Move at most one click on taste. Stop at “good enough for weekday.”
- Day 3 — Repeatability. Same click twice. If shots disagree, fix distribution before the dial.
- Day 4 — Move-size drill. Go two clicks coarser on purpose, taste the gush, return. Train recognition — keep volumes small.
- Day 5 — Milk-drink truth. If you drink lattes, taste under milk once; one click only if a clear defect shows.
- Day 6–7 — Guest pace, then lock. Make drinks without narrating the dial; keep the click and move-size rules; cut “just one more setting” when the cup was already fine.
Do not “save power” by skipping warm-up and blaming the dial for a cold first shot — home espresso energy is usually modest next to beans (energy.gov).
When to stop tweaking and just drink
Stop tweaking when this bag’s espresso-zone click is automatic, weekday cups taste like your baseline, and further clicks would only serve curiosity. A 45-setting range is a navigation tool, not a homework assignment to visit every notch.
One roast for weeks? Protect the bookmark; re-check when the bag ages or a new bag arrives. Rotate often? Train fast re-entry into the espresso neighborhood, not a museum of historical clicks. The settings-count myth guide waits for a quiet evening when you want the why more steps help argument again.
What grind size should I use on my Breville espresso machine?
No universal Breville click fits every bag.
Breville (and Sage) dials are brand- and model-specific — online charts are starting anecdotes, not physics you can paste onto another mill.
Use the same pedagogy on that dial: start in the brand’s suggested espresso zone, weigh dose and yield, classify gush vs choke, jump several steps for gross errors and one step for polish, then bookmark the winner for that bag. Do not copy a Breville number onto a Meraki 45-setting dial or the reverse. For Meraki hardware framing, verify the live espresso machine with grinder hub and product page.
What grind size should I use for my Moccamaster?
Coarser than espresso — not your espresso bookmark.
A Moccamaster is a filter brewer. It needs drip-range particles, not the fine espresso neighborhood you just dialed.
If your mill’s coarse end can reach filter texture, start coarser than espresso and adjust by cup clarity (muddy/silty → coarser; weak/sour → often finer within filter range, or dose/brew tweaks). Do not reuse your espresso click and expect filter coffee. If a built-in espresso mill barely reaches proper filter coarseness, that is a range limit — not a failure of the 45 espresso steps.
FAQ
What setting should a grinder be on for espresso? Whatever click on your machine produces balanced taste at your locked dose and yield — usually somewhere in that grinder’s finer espresso neighborhood, not a universal integer. Start from the manual’s espresso suggestion if it has one, then move by flow and taste. Meraki documents 45 grind settings without publishing one magic number for every bean; treat any saved click as bag-specific.
What is the 2:1 rule for espresso? A common starting brew ratio: about twice as much beverage weight as dry coffee dose (for example 18 g in → ~36 g out). It is a familiar home baseline, not a law that every great shot must obey. Lock a ratio while you learn the dial; let taste override the ratio when the cup disagrees. Full dose/yield teaching lives on Meraki’s dose and yield guide.
When should I move one click vs several on a 45-setting dial? Use several clicks (about 2–4) when the shot is clearly in the wrong neighborhood — gushing or choking. Use one click when you are already near a drinkable shot and polishing taste or a modest time miss. If shots disagree with the same click, fix distribution before you turn the dial again.
Do I need to use all 45 grind settings? No. Most espresso households live in a narrow active zone. Extra steps give resolution inside that zone and room for different beans over time — they are not a checklist to complete. Meraki’s is more always better page owns the settings-count myth; this page owns how to navigate the range you actually use.
How is grind-by-weight different from chasing clicks? Grind-by-weight / grind-to-scale dosing (Meraki: grind onto the built-in scale) keeps dose honest so each click is a fair test. Chasing clicks with scooped doses mixes two variables. Scales listed at ±0.2 g on Meraki’s specs table support that honesty — confirm live specs when you buy. The dial still needs the taste→adjust loop above.
If your goal is calm mornings on a fine-step home espresso grinder, run the neighborhood → move-size → taste loop above — and confirm today’s Meraki TIMEMORE® co-developed grinder, 45 grind settings, and grind-to-scale framing on the Meraki Espresso Machine product page or the espresso machine with grinder hub when you want the guided all-in-one path. Support: Meraki Support (+1 833 854 9555, Mon–Fri 9 AM–5 PM EST).


