


You already watched three pour videos, bought a pitcher, and still get hearts that look like commas. A latte art coffee machine practice plan only works when it is a calendar with drills, milk and pitcher choices, and stop rules — not another “how to pour a tulip” clip with no week structure.
This Meraki guide owns a practice curriculum: a progressive 4-week latte art practice plan at home, milk/pitcher staging for practice sessions, and honest checks for when machine steam is not the limiting factor. Soft-name dry steam espresso for home microfoam (dryness → pourable foam), powerful steam wand technique (scorch/safety under strong steam), and milk temperature sensor workflow (Auto Temp Stop habits). Soft-lane upcoming skill-stage maps and cappuccino/flat-white ratio essays. Soft-link Meraki’s latte art for beginners, master microfoam, and how to steam and texture milk for literacy you already own elsewhere. Soft-link the buyer-guide what is the best espresso machine for home use when you are still shopping hardware — this page is the practice plan after (or beside) that decision.
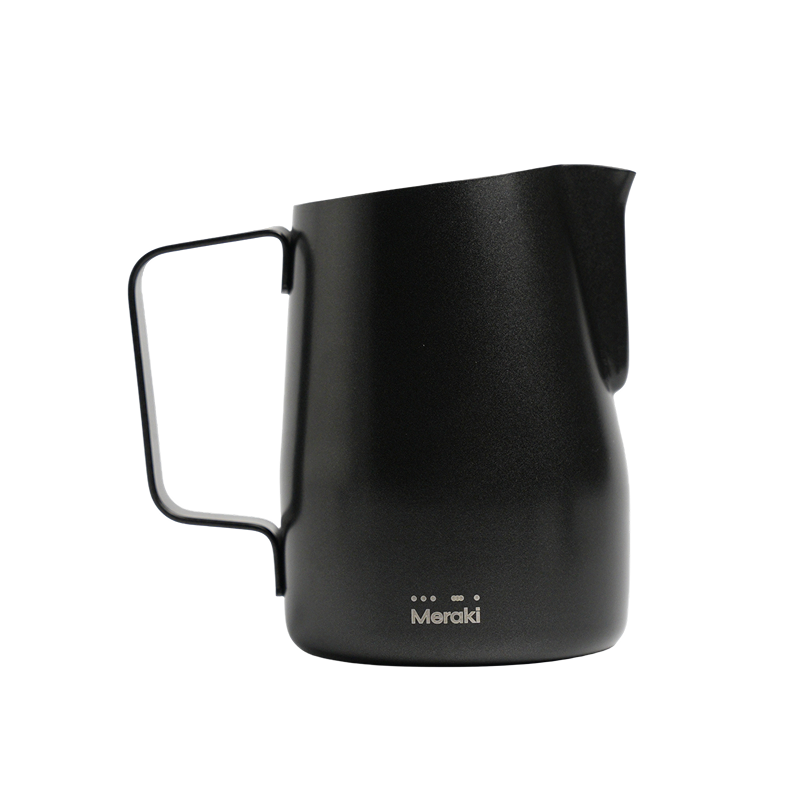
Practice starts with a matched pitcher and cold milk you will actually finish — then a weekly drill list, not a new YouTube rabbit hole.
What “latte art coffee machine practice plan” really means for home buyers
Latte art coffee machine practice plan, for home buyers, means a progressive drill calendar on a home espresso steam wand — milk, pitcher, session length, and stop rules — not a machine roundup and not a single viral pour tutorial.
Search is noisy. Reddit practice threads, Facebook tips, “best machine for latte art” shopping cards, and dish-soap steaming hacks all rank near this query. Those pages sell inspiration or hardware. A useful espresso machine for latte art practice plan answers different questions: What do I practice this week? Which milk and pitcher size keep feedback honest? When should I stop blaming steam and check puck, prep, or brew ratio first?
Café literacy from the Specialty Coffee Association, CoffeeGeek guides, and About Coffee brewing still starts with espresso you can taste and milk you can pour. Latte art is the last layer — not a substitute for a drinkable shot.
Who this page is for (and who should skip it)
This page is for latte art beginners on a home espresso machine who want a 4-week curriculum with weekly drills, milk/pitcher choices, and clear “stop practicing and drink” rules — especially owners who already steam but cannot get a clean heart on a weekday.
Skip first stretch literacy — how to steam and texture milk. Skip microfoam polish — master microfoam. Skip first pour shapes — latte art for beginners. Soft-name dry steam espresso for home microfoam when dryness → pourability is the gap; soft-name powerful steam wand technique for scorch/safety; soft-name milk temperature sensor workflow for Auto Temp Stop habits. Soft-link pitcher sizes when volume matching is the only question. Soft-link steam-wand milk-drinks shopping and best espresso machine for home use when you are still choosing a machine. Soft-lane upcoming skill-stage taxonomies and drink-ratio curricula. Come here for calendar + drills + when steam is not the bottleneck.
Why this is a practice curriculum (not another pour tutorial)
SERP leans community clips, one-off beginner pours, and “recommended machine for latte art” threads. Meraki already publishes pour and microfoam literacy on espresso-brewing. Soft-link those; do not clone them. Soft-lane upcoming skill-stage essays if they map levels (what “beginner / intermediate” means) — this page owns the calendar: week-by-week drills, milk/pitcher staging, and stop rules.
The unique job is practice curriculum — progressive weeks, one primary drill per session, and an honest steam-vs-prep diagnostic. Disclosure: Meraki publishes this guide and sells the Meraki Espresso Machine. Live framing (2026-10-26/27): dual boilers, dedicated 550 ml steam boiler (vendor claim), powerful dry steam with Auto Temp Stop, warm-up about 3–4 minutes, rotary framed at steady 9 bar, dual scales (1 kg · ±0.2 g — vendor claim) — confirm live. Café-menu latte ~1:3 and cappuccino/flat white ~1:2 are drink balance starting points from Meraki’s guided menu framing — soft-lane drink-specific curricula; do not treat them as pour scores. No fabricated competition scores. Channel: espresso-brewing.
Tools and settings to prepare first (milk and pitcher choices for practice)
Curriculum fails when the station is half-awake and the pitcher is wrong for the cup. Stage tools while boilers warm: clean portafilter and basket, a dry cloth for the wand, fridge-cold milk you will finish in one practice pour (plus a spare cold pitcher if you re-steam), and a matched pitcher — spout that centers over your cup, fill line with stretch room, not a giant pitcher for a tiny cup.
Milk choices for practice: whole dairy is the most forgiving feedback loop for most beginners. Plant milks behave differently — treat them as a separate week once dairy hearts are boring. Do not change milk brand, fat level, and pitcher size on the same day; the curriculum needs one variable at a time. Keep milk cold until steaming (FDA safe food handling; CDC food safety).
Pitcher choices for practice: size to the drink, not to Instagram. Soft-link milk pitcher sizes for latte art. A stainless pitcher you can swirl and tip cleanly beats a decorative jug. Meraki’s accessory ecosystem includes a stainless frothing pitcher image on the store CDN — confirm what ships with any current kit on the product page; do not assume a size without checking.
On Meraki’s current framing, dual boilers heat in about 3–4 minutes and the guided path runs grind → brew → steam → serve — confirm live. Soft-name dry-steam / powerful-wand / sensor-workflow pages if dryness, power, or stop trust is still chaotic; stay here for what to practice this week.
Step-by-step practice session workflow
A practice session is shorter than a YouTube binge. Use this order until it feels boring in a good way.
- Warm fully, then purge the wand. Wait for steam-side ready. Clear condensed water into the drip tray — an unpurged first burst sabotages foam before any pour drill starts.
- Pull one honest espresso for the cup you will pour into. Do not practice latte art on a thin, sour, or gusher shot and then blame the pitcher. Soft-link dose/yield literacy elsewhere if the shot is the real problem.
- Stage cold milk in the matched pitcher. Familiar fill line; stretch room; same milk as yesterday unless the week’s experiment says otherwise.
- Steam for texture first — shape second. Short stretch, early roll, stop for sweet milk. Soft-name dry steam espresso for home microfoam for pourable gloss targets; soft-name powerful steam wand technique if strong steam is scorching; soft-name milk temperature sensor workflow if Auto Temp Stop trust is the weekday blocker.
- Wipe immediately, purge again. Hygiene protects the next attempt — soft-link steam wand hygiene.
- One pour drill only. Heart height, center pour, or gentle wiggle — pick the week’s drill from the curriculum below. Do not chase a swan after a failed heart.
- Photograph or note one line. “Too high / too late / foam too dry / shot too thin.” One note beats ten forgotten pours.
- Thirty-second reset. Empty leftover milk, rinse pitcher, clear the cloth. If you re-steam, start with fresh cold milk — reheating practice milk teaches the wrong texture cues.
Dual boilers let brew and steam overlap on a weekday; that helps the curriculum, but it does not replace the drill list. Soft-link steam-wand milk-drinks shopping only when hardware, not practice structure, is the open question.
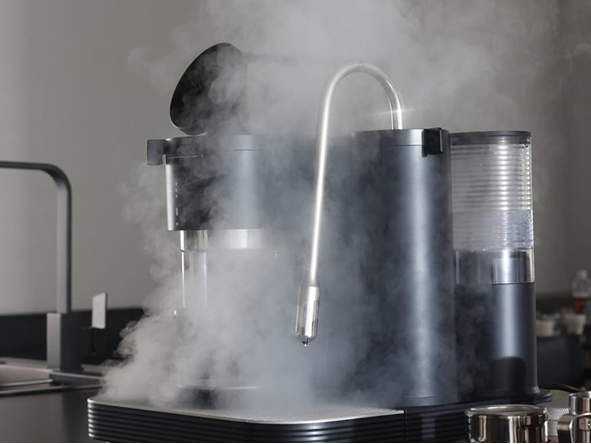
Week-one wins look like glossy, pourable milk and a centered heart attempt — not a gallery of unfinished tulips.
Targets and ranges that keep you out of rabbit holes
Targets keep practice from becoming endless “almost.” Use bands, not certificates.
| Practice target | Starting band (home) | What “good enough” feels like | What not to chase this week |
|---|---|---|---|
| Session length | 1–2 drinks, then stop | You finished the week’s drill once with a note | Five re-steams until foam dies |
| Milk volume | Matched to cup + stretch room | Pitcher empties into one cup without leftover foam mountains | Oversized pitcher for a demitasse |
| Foam for latte-style pour | Glossy, paint-like, still flows | Soft-name microfoam page for dryness → pourability | Dry Instagram foam that will not pour |
| Heat stop | Sweet milk, not cooked | Hand cue and/or Auto Temp Stop (Meraki live framing) | Waiting for a prettier whirlpool after milk is already hot |
| Pour focus (W1–W2) | Center + height for a heart | Soft-link first three pours | Swan / rosetta gallery |
| Espresso under the art | Drinkable, crema present | Soft-link ratio/dose literacy if shot is thin/harsh | Blaming steam for a gusher puck |
Menu ratios (latte ~1:3, cappuccino/flat white ~1:2) are cup-balance starting points — soft-lane drink curricula. SCA research and Barista Magazine’s Meraki test drive are useful context for judging steam by the pitcher; your notes still win.
When machine steam is not the limiting factor
Blame steam last — after puck, prep, and ratio.
If foam looks glossy in the pitcher but the pattern dies, the bottleneck is often pour height, timing, or cup tilt — soft-link latte art for beginners. If foam never glosses, check purge/wipe and stretch length first — soft-name dry steam espresso for home microfoam. If milk scorches or volcanoes, soft-name powerful steam wand technique. If heat stop is chaotic, soft-name milk temperature sensor workflow.
If the espresso is thin, sour, hollow, or channeling before milk touches it, steam will not save latte art. Fix dose, distribution, tamp, grind, or yield stop before buying a “better steamer” narrative. Soft-link brew-by-weight / ratio literacy on Meraki’s espresso-brewing cluster when the shot is the honest problem. Soft-link best espresso machine for home use only when you are still comparing machine classes — not as a substitute for this week’s drill.
Steam is limiting when the wand cannot sustain texture for a matched pitcher after an honest purge, or when wet/sputtery steam dilutes every attempt. Verify listing language (dedicated steam path / dry steam / manual purgeable wand) on the product page before rewriting your entire curriculum around a hardware upgrade fantasy.
Common mistakes and quick fixes
Most “I practiced for a month and got nothing” complaints are curriculum errors, not missing swan tutorials.
| Mistake | What you feel | Quick fix |
|---|---|---|
| Practicing five shapes in one session | Noise, no progress | One drill per session; log one line |
| Oversized pitcher for a small cup | Foam you cannot control | Match pitcher to drink — soft-link pitcher sizes |
| Reheating the same milk | Muddy texture cues | Fresh cold milk only |
| Skipping purge/wipe | Random wet starts | Purge → steam → wipe → purge every time |
| Blaming steam for a bad puck | Pretty foam on harsh espresso | Fix shot first; then pour |
| Changing milk, grind, and pitcher same day | No causal lesson | One variable per week |
| Practicing until foam collapses | Frustration | Cap at 1–2 drinks; stop rule below |
How to taste and decide what to change next
After the pour, taste the drink — not only the photo. Sweet milk + balanced espresso means keep the week’s drill. Cooked milk means stop heat earlier (soft-name sensor workflow / powerful-wand safety). Harsh espresso under a perfect heart means change grind or yield before another pour video. Flat, bubbly foam means shorter stretch and earlier roll (soft-name microfoam focus). Pattern off-center means pour height and start position — soft-link first-three-pours literacy.
Write one next change on a sticky: “W2: lower pour height” or “fix shot first — stop latte art today.” Curriculum without a decision rule becomes hobby doomscrolling.
A 4-week latte art practice plan at home
This is the curriculum spine. Keep sessions short. Soft-lane skill-stage taxonomies if you want level names later — here the weeks are the map.
| Week | Primary drill | Milk / pitcher note | Pass rule (move on when…) | Soft-lane if stuck |
|---|---|---|---|---|
| 1 | Glossy pourable foam + center free-pour (no shape stress) | Whole dairy; matched pitcher; 1–2 drinks | Foam looks like wet paint and still flows | Soft-name dry-steam microfoam; soft-link steam + texture |
| 2 | Heart: start high, drop, gentle push | Same milk/pitcher as W1 | Recognizable heart 2 of 3 weekday attempts | Soft-link first three pours |
| 3 | Heart consistency + cup/pitcher alignment | Optional: one size tweak or one milk brand — not both | Same heart without changing three variables | Soft-link pitcher sizes; soft-name powerful-wand / sensor workflow if heat/power chaos |
| 4 | Simple tulip or second heart under milk-drink ratio | Keep foam latte-leaning; soft-lane cappuccino/flat-white curricula for thicker foam drinks | One clean shape you can repeat on a weekday | Soft-link master microfoam; soft-lane upcoming drink-ratio pages |
Miss a day? Do not “make up” with five pours. Resume the week’s primary drill. If Week 1 foam never glosses after honest purge/wipe, pause the calendar and soft-name the microfoam / dryness lane before forcing hearts.
When to stop tweaking and just drink
Stop the practice loop when you hit the session cap (1–2 drinks), when foam collapses from re-steaming, or when the sticky already names tomorrow’s single change. Drink the cup. Latte art practice that never ends in a finished drink trains performance anxiety, not skill.
Also stop blaming steam after you have verified purge, pitcher match, and a drinkable shot — return to the “steam is not limiting” checks above. Soft-link support for machine issues; soft-link buyer guides only when hardware class is still open.
FAQ
How long should a home latte art practice session last? Short: usually one or two finished drinks with a single drill and one written note. Longer sessions that reheat milk teach bad texture cues and burn weekday motivation. Use the 4-week table above; soft-link pour literacy pages when the drill itself is unclear.
What milk and pitcher should beginners use for practice? Whole dairy in a pitcher matched to your cup is the most forgiving default for most home beginners. Change only one variable per week. Soft-link pitcher sizes for latte art; confirm any kit pitcher size on the live product page.
When is machine steam not the limiting factor for latte art? When foam is already glossy but patterns fail (pour skill), or when the espresso under the milk is thin, harsh, or channeling (puck/prep/ratio). Fix those before shopping another steamer narrative. Soft-name dry-steam / powerful-wand / sensor-workflow pages only when texture, power, or heat stop is the honest gap.
Do I need a dual-boiler espresso machine for this practice plan? No — you need a purgeable steam wand, cold milk, a matched pitcher, and a drinkable shot. Dual boilers (Meraki live framing: brew + steam overlap, ~3–4 minute warm-up) make weekday sessions smoother; they do not replace drills. Soft-link best espresso machine for home use for shopping; stay here for curriculum.
Is this the same as Meraki’s first-three-pours or microfoam guides? No. Those pages own pour shapes and microfoam polish. Soft-name dryness, powerful-wand, and sensor-workflow articles for adjacent steam jobs. Soft-lane upcoming skill-stage and drink-ratio essays. This page owns the 4-week practice curriculum, milk/pitcher staging, and steam-vs-prep stop rules on espresso-brewing.
If your goal is a latte art coffee machine practice plan you can actually finish, run Weeks 1–4 above — one drill per session, matched milk and pitcher, and steam blamed only after puck and prep check out — then confirm today’s Meraki powerful dry steam, dual boilers, 550 ml steam boiler, and Auto Temp Stop framing on the Meraki Espresso Machine product page when you want the guided all-in-one path. Support: Meraki Support (+1 833 854 9555, Mon–Fri 9 AM–5 PM EST). Shipping and refunds: shipping policy, refund policy.


