


You unboxed a machine with a bright screen and a built-in mill — then mornings feel like two gadgets arguing: grind prompts, drink tiles, dose numbers, and a puck that still needs your eyes. An espresso machine with grinder and touchscreen learning curve only flattens when you decide which prompts to trust first, when to ignore the glass and watch the shot, and how to practice for a week without thrashing every menu.
This Meraki how-to is that learning-curve playbook for tech-curious beginners: stage a screen-aware station, run a trust-the-prompt / watch-the-puck workflow, keep targets boring, triage screen-vs-shot mistakes, taste with one next change, and lock a seven-day practice plan. It is not a rewrite of Meraki’s what is a touchscreen espresso machine explainer, the touchscreen-for-home landing page, programmable control and presets, draft profiles that actually help (A029), or the grinder-and-scale daily workflow (A046). Soft-link those for their jobs; use this page when the question is how do I climb the screen + integrated-grinder curve without living in the menus?
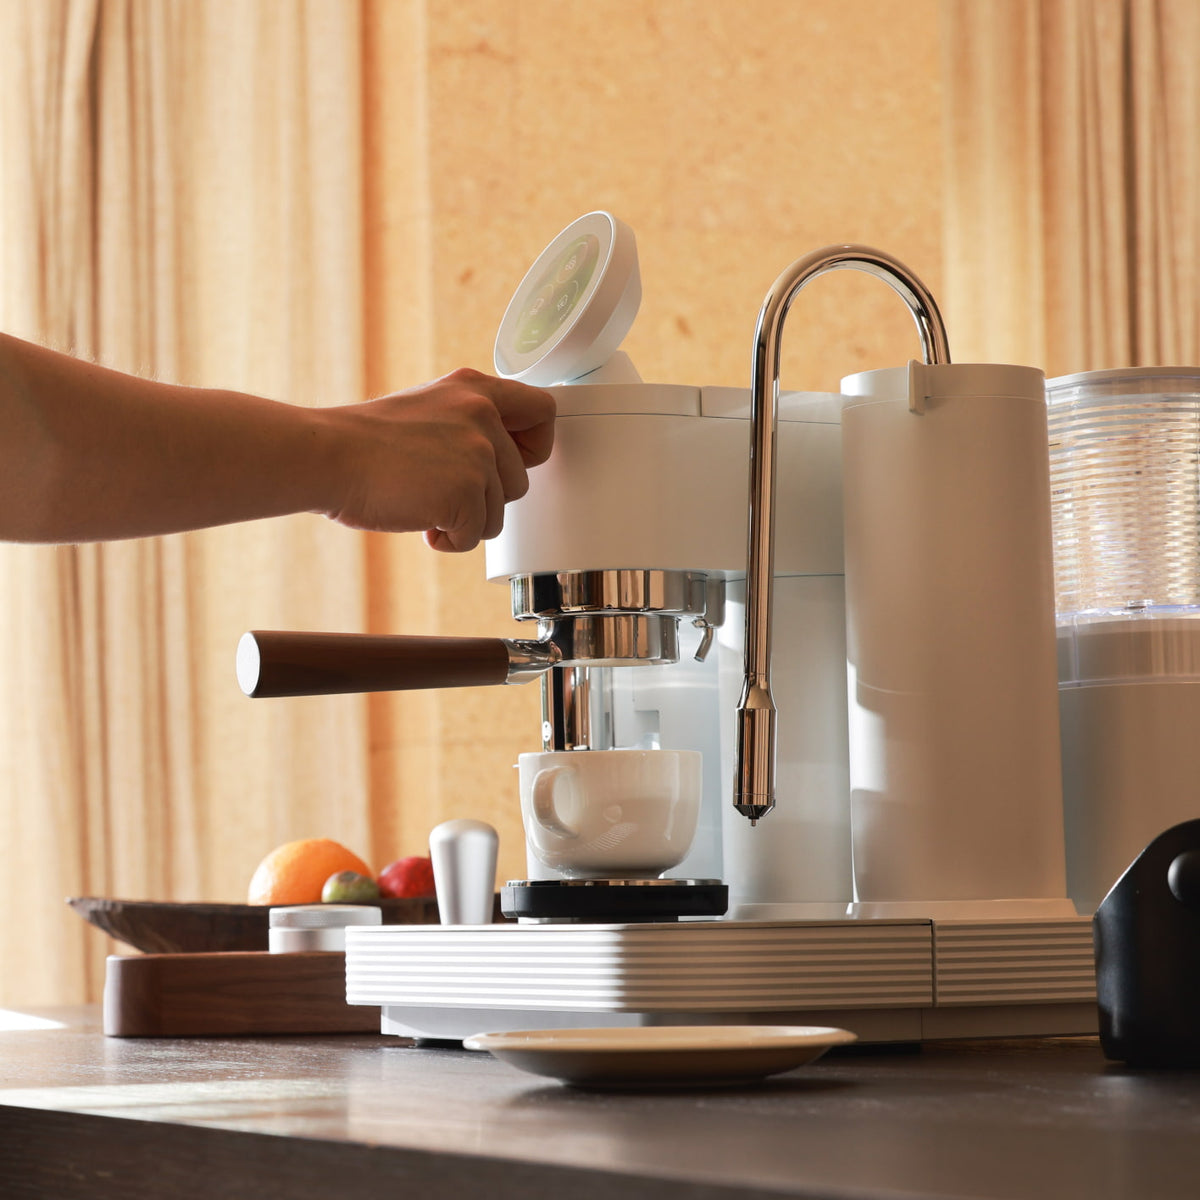
A practical learning curve is screen literacy plus puck literacy — trust guided grind and weigh prompts early, then watch the shot when taste disagrees with the glass.
What “espresso machine with grinder and touchscreen learning curve” really means for home buyers
“Espresso machine with grinder and touchscreen learning curve” in search often collapses into “best touchscreen coffee maker,” super-automatic shopping chips, or “is that brand hard to learn?” forum threads. For a home buyer it means something narrower: the time and habits it takes to run an interactive guided path that also drives an integrated mill — without treating every tile as a new hobby before breakfast.
A touchscreen can sequence grind → dose → brew → steam and show targets. An integrated grinder removes a separate mill handoff. Neither removes bean age, distribution, or taste judgment. The learning-curve win is knowing which prompts are trustworthy scaffolding (warm-ready, grind-to-weight, brew-to-yield, drink start) and which moments need your eyes on the portafilter and stream.
Treat the keyword as skill acquisition with a guided + milled system, not as a ranking of “easiest screen in the world.” Meraki’s what is a touchscreen page owns the concept. The touchscreen landing page owns the product-path story. This page owns the first-week climb.
Who this page is for (and who should skip it)
This page is for tech-curious beginners and careful new owners who already have (or are committing to) a guided touchscreen plus integrated grinder and need a practical learning curve — which prompts to trust, when to ignore the screen, and a week practice plan.
Skip the what is a touchscreen explainer, the touchscreen-for-home landing, profiles that actually help / live programmable control and presets, and the grinder-and-scale daily workflow. Skip a general first-week or first-month syllabus when those are your only question. Come here for: which prompts do I trust first with an integrated grinder — and when do I watch the shot instead?
Why this is a learning-curve guide (not a what-is-touchscreen rewrite)
SERP for this query is noisy: compact espresso YouTube, “best coffee maker in the world” PAAs, Sage/Oracle guided-hand stories, and grinder-included roundups that mention a “steeper curve than fully automatic.” Few pages teach a prompt-trust vs puck-watch curriculum for a home system that already combines a screen and a mill.
The unique job here is that learning curve: which first-week prompts to obey, when the glass is lying relative to the stream, a mistakes table for screen distraction, a taste → next-change rule that does not open the whole menu, a seven-day practice plan, and stop-tweaking criteria. Disclosure: Meraki publishes this guide and sells the Meraki Espresso Machine. Live product framing (2026-10-26/27 snapshot): guided / intuitive touchscreen path Grind → Dose → Brew → Steam, true burr grinder co-developed with TIMEMORE®, grind-by-weight onto the built-in dose scale, dual scales 1 kg · ±0.2 g, dual boilers (about 3–4 minutes warm-up on current FAQ language — confirm live), commercial rotary pump framed at steady 9 bar. Meraki examples show one verified path — not a universal UI map for every brand, and not a “best in the world” claim.
Tools and settings to prepare first
Learning-curve practice fails when the screen is awake and the station is not. Stage tools while boilers warm: clean, dry portafilter and basket; distribution and tamp tools you actually use; a clear cup for the yield path; a sticky note with one weekday drink, one dose, one yield (or brew-ratio band), and the rule “change one thing — tomorrow.”
On Meraki’s current framing, dual boilers heat in about 3–4 minutes and the guided path runs grind → brew → steam → serve — re-check warm-up language on the product page and the touchscreen landing. If your machine uses a separate mill, the trust-vs-watch habits still hold; you simply add a handoff the integrated chute removes.
Pick dose and yield from your basket’s honest range — Meraki’s dose and yield dial-in owns the method. This page only asks you to write one pair and leave the profile library alone for seven days. Literacy from the Specialty Coffee Association and CoffeeGeek’s guides beats “always 18/36” memes and “best on earth” listicles that ignore your puck.
Step-by-step workflow: trust prompts, then watch the shot
The weekday win is a short loop that finishes before curiosity opens Advanced.
- Warm fully — trust the ready state. Do not grind because the screen lit early. Confirm ready / heat status, then seat a clean portafilter under the chute.
- One drink tile + sticky-note pair. Pick espresso, latte, cappuccino, flat white, or americano — stop shopping tiles. Confirm dose and yield once. Profile museums wait on profiles that actually help; this week you follow, not curate.
- Zero / tare. Empty basket, clear chute face, dose at zero; dry cup, yield at zero. NIST reminds you: a scale is only as honest as its zero — a pretty UI cannot invent honesty.
- Trust grind-to-weight — then stop. Guided grind finishes at target. No bonus taps. Note undershoot once; do not chase grams before you understand retention.
- Ignore the screen for distribution and tamp. Even dose still needs an even puck. Same hand sequence every morning.
- Start brew from the prompt — then watch the shot. Glance at yield / auto-stop, but keep eyes on the stream: one-sided blonding, sputtering, or a syrup crawl beat a happy progress bar. Stop at sticky-note yield. No grind changes mid-pour.
- Steam only if the sticky note says milk — then serve. Taste once. Name one taste word before any change.
- Thirty-second reset. Knock, wipe basket and chute, clear scale paths, leave the weekday tile alone.
Full grind→dose→yield glue lives on the grinder-and-scale workflow page; preset philosophy waits on programmable hubs.
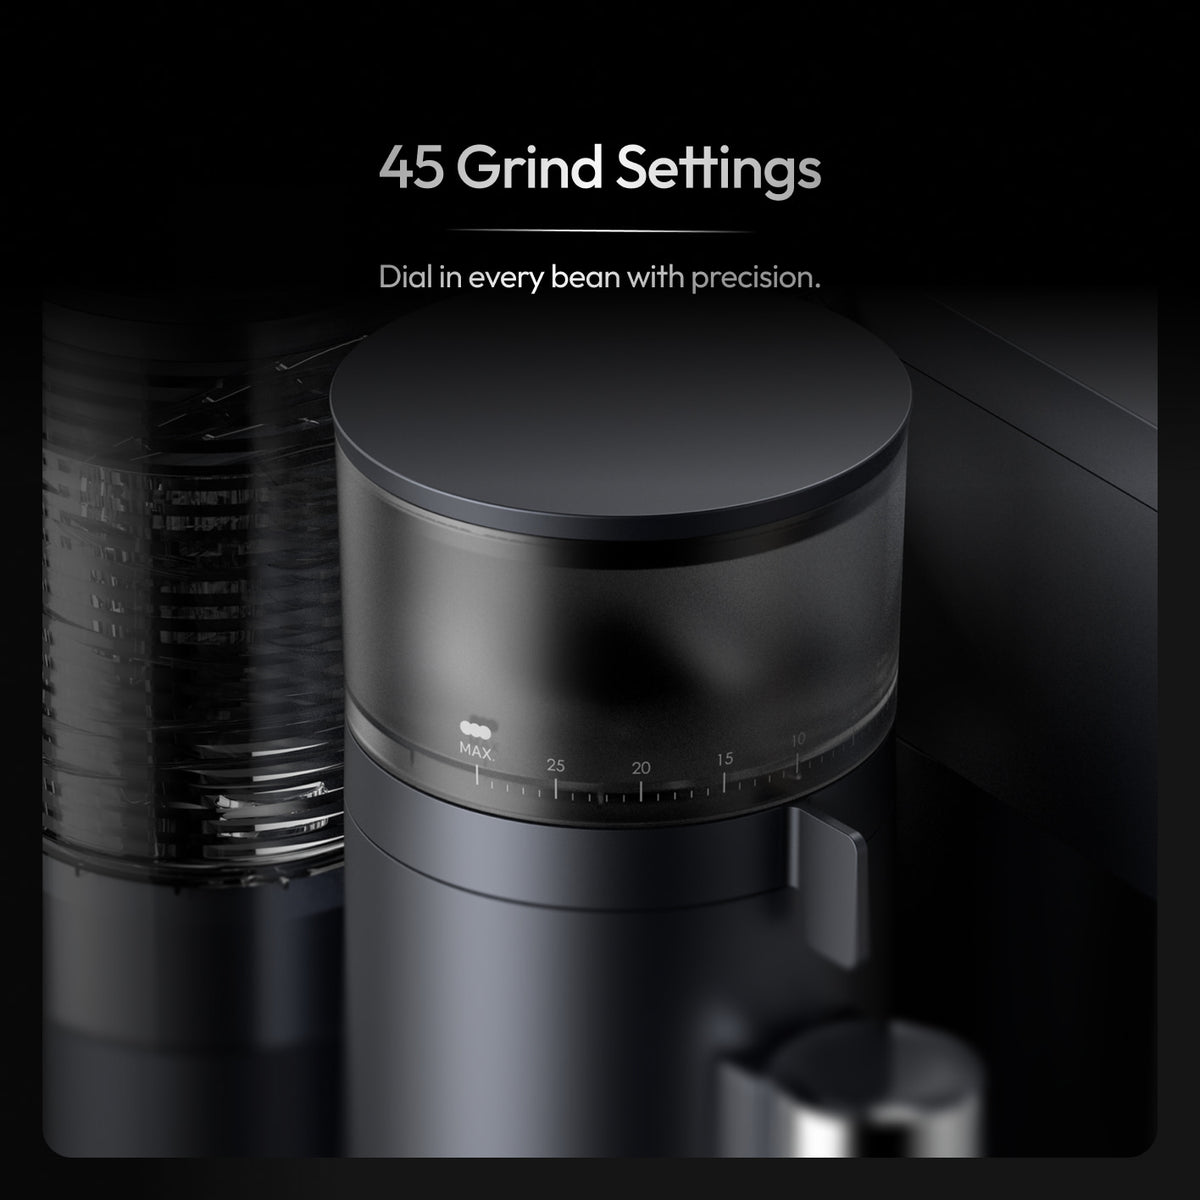
Integrated grind settings stay boring in week one — trust grind-to-weight prompts, watch the stream during brew, and save dial tourism for after the sequence is automatic.
Targets and ranges that keep you out of rabbit holes
Targets keep the learning curve from becoming a settings novel. Prefer one weekday drink, one dose, one yield (or a familiar brew-ratio band) — not a tour of every grind click the screen makes visible.
Many homes start near a classic ~1:2 brew-ratio habit (for example ~18 g in → ~36 g out) while they learn prompt trust — a café-culture baseline from literacy such as NCA brewing basics and SCA research, not a law. Lock the pair first; let dial-in hubs teach when to break it.
Meraki lists dual scales to ±0.2 g with a 1 kg capacity on current specs — honest dose and yield, not a license to chase hundredths before you taste sour vs bitter. Extraction time is a traffic light (mid-twenties into low thirties of seconds is a common home band). Menu framing (latte ~1:3, cappuccino / flat white ~1:2 on current product language) is a drink-habit start — confirm live.
Prompt-trust vs puck-watch rules
| Moment | Trust the screen | Watch the puck / stream instead |
|---|---|---|
| Warm-up | Ready / heat status | Do not grind early “to save time” |
| Dose | Grind-to-weight / target grams | Chute face, basket crumbs, bonus taps |
| Prep | Drink tile + written pair | Distribution and tamp hands |
| Brew start | Start / brew-by-weight prompt | Early blonding, channeling, crawl |
| During pour | Yield approaching target | Stream color and symmetry |
| After sip | Log one taste word | Do not open Advanced mid-cup |
| Next day | Same tile and pair | One variable only if taste demands |
For milk drinks, keep the espresso pair honest first; steam texture is a separate skill — not a reason to abandon prompt discipline on the shot.
Common mistakes and quick fixes
Most “this touchscreen + grinder feels harder than my old drip” complaints are attention splits, not broken UIs.
| Mistake | What you feel | Quick fix |
|---|---|---|
| Reading every tile before first sip | Decision fatigue; cold coffee | One weekday drink for seven days |
| Trusting progress bars, ignoring blonding | “Perfect yield,” hollow taste | Eyes on stream; fix distribution next shot |
| Bonus grind taps after auto-dose | Dose drift; blame the screen | Motor off at target; wipe chute |
| Opening profiles mid-week | No baseline | Soft-link profile pages later; freeze the tile |
| Changing grind and dose same morning | No idea what worked | Freeze dose; change grind only tomorrow |
| Grinding before ready | Thin first shot; blame the mill | Warm fully; stage tools during heat-up |
| Expecting the UI to fix channeling | One side races; numbers look fine | Even puck; weighing was never the villain |
| Tweaking before tasting | Endless menus, no vocabulary | Finish the loop; one taste word; change tomorrow |
If masses are honest and taste still fails, jump to Meraki’s dose and yield method. Shopping context for integrated mills lives on the espresso machine with grinder page.
How to taste and decide what to change next
On a learning-curve week, taste answers one question first: did I follow the prompts and still watch the shot? If dose or yield missed, fix zeros and chute before you touch grind. If both masses are honest and the shot is wrong, name the defect once — then change one thing tomorrow.
Sour-thin with fast flow usually wants finer grind. Harsh-bitter with a syrupy crawl usually wants coarser. Muddy or hollow with “perfect” grams often wants distribution — the touchscreen cannot flatten an uneven puck. Under milk, ask whether espresso still tastes like coffee once diluted.
Change one variable after the sequence is automatic: usually grind, sometimes yield, almost never weekday dose until the bag changes. Keep a four-line note: date, prompts followed?, stream even?, one taste word. Press context appears in places like Barista Magazine; still judge your cup.
A one-week practice or habit plan
A week installs screen + grinder muscle memory without turning coffee into UI homework. Keep the same beans and the same drink tile.
- Day 1 — Ready + zeros + one tile. Warm → confirm drink → tare → grind-to-weight → brew to yield twice. Ignore latte art and Advanced.
- Day 2 — Same hands, same pair. Identical distribution. Goal: two mornings that hit dose and yield without bonus taps or mid-shot menu opens.
- Day 3 — Watch-the-shot drill. Eyes on the stream during pour; still stop at sticky-note yield. Note blonding or crawl once.
- Day 4 — Prompt-distraction triage. Feel the urge to open a second tile or peek at profiles — then refuse.
- Day 5 — Bean-change rehearsal. Clear chute, re-tare, confirm dose lands before judging grind. Do not rebuild dose and grind together.
- Day 6–7 — Guest pace, then lock. Make drinks without narrating the screen. Cut “one more setting” when the cup was already fine.
Do not skip warm-up to “save power” and then blame the touchscreen for a cold first shot — home espresso energy is usually modest next to beans (energy.gov). Keep cords dry and outlets appropriate (UL).
When to stop tweaking and just drink
Stop tweaking when ready-state checks, tare habits, and the weekday tile are automatic — and further menu visits would only serve curiosity. An espresso machine with grinder and touchscreen learning curve is a trust-and-watch habit, not a mandate to explore every screen before breakfast.
One roast for weeks? Protect the sticky-note pair; re-check when the bag ages. Rotate often? Train fast reconfirmation of prompts and zeros, not a museum of tiles. Soft-link the what-is-touchscreen explainer, profiles that help, and the grinder-and-scale workflow when those are the open questions.
What is considered the best coffee maker in the world?
There is no single “best coffee maker in the world.” “Best” depends on drink style, skill patience, counter space, and whether you want capsules, drip, super-automatic convenience, or espresso control — not a universal trophy.
Noisy PAAs love absolute winners. For a touchscreen-plus-grinder home system, judge learning-curve honesty: can you trust guided dose/yield prompts, watch the shot, and finish a weekday drink without living in menus? Meraki does not claim a global crown; verify the guided path on the live product page.
Is an espresso machine with a grinder worth it?
Often yes — if you value fresh grinding and fewer handoffs. An integrated mill cuts separate-grinder cost and counter clutter, but you still learn dose, distribution, and taste; a screen only shortens the handoff, not the skill.
Worth it when you use fresh beans most mornings and prefer one guided chain over buying a mill later. Less worth it if you want push-button super-automatic convenience, or already love a separate high-end grinder. Soft-check Meraki’s espresso machine with grinder page for product-path framing; use this article for the learning curve after unboxing.
Conclusion
A practical learning curve on a touchscreen espresso machine with grinder is prompt discipline plus puck attention: warm fully, lock one drink tile and dose/yield pair, trust grind-to-weight, ignore the glass for distribution, watch the stream during brew, taste once, change one thing tomorrow. That climb is what tech-curious beginners need — not a what-is-touchscreen rewrite, not a profiles deep dive, and not another weighing-chain essay.
If that path matches your mornings, review the current Meraki Espresso Machine and the touchscreen-for-home page for your region, or ask Meraki Support (+1 833 854 9555, Mon–Fri 9 AM–5 PM EST). Shipping, refund, and warranty details live on the shipping, refund, and warranty claim pages.
FAQ
Which touchscreen prompts should I trust first with an integrated grinder?
Trust ready/heat status, the single weekday drink tile, grind-to-weight (or auto-dose) to your sticky-note dose, and brew-to-yield / auto-stop if offered. Treat those as scaffolding for week one. Do not treat every Advanced tile, profile library, or grind click as equally urgent — freeze the menu until the sequence is boring.
When should I ignore the screen and watch the shot instead?
During distribution and tamp, and throughout the pour. Progress bars and happy yield numbers cannot show one-sided blonding, channeling, or a syrup crawl. Glance at the target grams, but keep eyes on the stream; fix puck prep before you open grind settings mid-shot.
What coffee machine makes frothy coffee?
Frothy milk drinks need a steam wand (or an automatic frother) plus technique — not a touchscreen alone. Espresso machines with a proper steam wand can texture milk for latte, cappuccino, or flat white once the espresso base is honest. Guided menus help sequence steam after brew; they do not replace pitcher angle, air, and heat control.
How is this different from Meraki’s “what is a touchscreen espresso machine” page?
That page explains what a touchscreen espresso machine is and why guided UI exists. This page is the practical learning curve after you own a screen-plus-grinder system: which prompts to trust first, when to watch the puck, mistake triage, and a one-week practice plan. Soft-link the explainer for definitions; use this article for skill acquisition.
Should I save lots of profiles in week one?
No. Keep one weekday drink and one dose/yield pair for seven days so you build a baseline. Useful-vs-gimmick profile saving belongs on Meraki’s programmable profiles / presets pages once the trust-and-watch loop is automatic. Early profile museums create decision fatigue, not faster learning.


