


Moving from capsule coffee to freshly ground espresso feels like a much bigger change before you make it than after. A capsule machine asks for almost nothing: insert a pod, press a button, and accept the recipe built into it. A semi-automatic setup gives some of those decisions back to you.
That does not mean your first week needs to become a technical course.
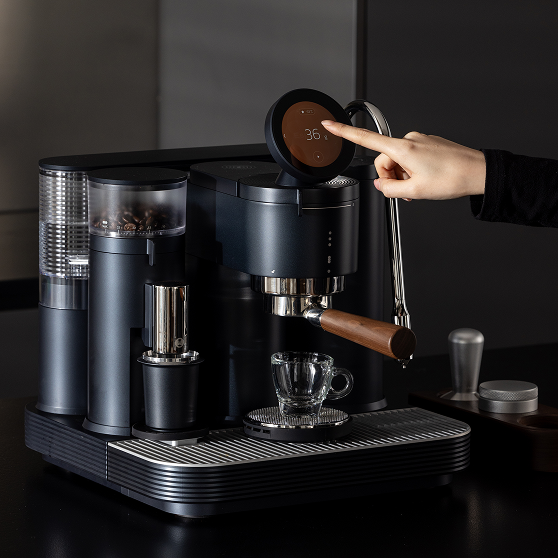
With the Meraki Espresso Machine, dose and beverage weight are measured inside the workflow, so a new user can spend the first few days learning the things that actually benefit from practice: choosing a grind setting, preparing the coffee bed, tasting the result, and steaming milk.
If you are coming directly from capsules, the easiest way to learn is not to chase the perfect espresso on day one. Build one repeatable habit at a time.
What Will Feel Different After a Capsule Machine?
The first difference is not flavor. It is visibility.
With capsules, the amount of coffee, grind, and basic extraction recipe have already been decided for you. When you start using whole beans, you suddenly see variables that were previously hidden.
A typical espresso recipe gives you three useful numbers:
- how much ground coffee goes into the basket;
- how much espresso comes out;
- how long the extraction takes.
You do not need to obsess over all three immediately.
Start with a consistent dose and target yield, then use grind size as your main adjustment. If a shot runs quickly and tastes sharp or thin, move finer. If it struggles to flow and tastes dry or overly bitter, move coarser.
What Should You Have Ready Before the First Shot?
Do less shopping than you think.
The machine already integrates much of the equipment that normally spreads across a home espresso counter. What matters more during the first week is having coffee and water that give the machine a fair chance.
Start with fresh whole beans rather than supermarket coffee that may have spent months on a shelf. A forgiving medium roast is usually easier for a first bag because it gives you enough sweetness and body without making small extraction errors brutally obvious.
Do not buy five different bags during your first week. One bean gives you a reference point. When the coffee stays the same, you can actually tell whether your grind adjustment helped.
Days 1–2: Learn the Workflow Before Judging the Coffee
Use the first day to learn where everything happens.
Fill the tank, add beans, follow the first-use process, grind into the portafilter, distribute the coffee, tamp it level, lock the portafilter in place, and pull a shot.
Drink it.
Do not immediately decide that the grind is wrong because your first espresso is not café-perfect. The value of the first shot is that it gives you a baseline.
On day two, begin adjusting the grind.
Keep the coffee dose and target yield unchanged. Move the grind by one step, make another shot, and compare the taste.
Days 3–4: Stop Chasing Numbers and Start Connecting Them to Taste
Once you have a shot that flows reasonably well, repeat it.
Two or three similar shots teach you more than constantly experimenting.
Keep a short note such as: “Medium roast — grind 18 — 18 g dose — 36 g yield — slightly sharp.”
Your notes do not need to become a coffee spreadsheet. They simply prevent you from repeating the same failed adjustment tomorrow.
If you want to understand why dose, yield and grind interact the way they do, move into Meraki's Espresso & Brewing guides.
Day 5: Learn Milk Separately From Espresso
Do not wait until you have “mastered espresso” before steaming milk.
Milk is a separate skill.
The aim is not to make latte art immediately. First learn to create milk that is glossy rather than bubbly. Small changes in steam-tip depth and pitcher angle can completely change the texture.
Practice with the same pitcher and roughly the same amount of milk each time. Once you can create repeatable texture, combine it with the espresso workflow you already practiced during the first four days.
Days 6–7: Make Two Drinks in a Row
A useful final test is not one beautiful espresso.
Make two drinks back to back.
That exposes the practical weaknesses in your routine: forgetting to purge the steam wand, leaving grounds on the basket edge, losing track of the grind setting, or taking so long between steps that the process becomes frustrating.
By the end of the week, you should be able to make a drink without mentally narrating every movement.
Which Skills Matter Most in the First Month?
Once the basic sequence feels familiar, focus on three things.
First, learn to tamp level rather than simply tamp hard.
Second, learn to recognize how grind changes affect taste and flow.
Third, learn milk texture by sound and movement instead of relying entirely on a temperature target.
The machine can measure variables for you, but it cannot taste the cup. That remains your job, and it is ultimately what makes the transition from capsules worthwhile.
Do You Need Extra Accessories Immediately?
Probably not.
A common mistake after leaving capsules is assuming “real espresso” requires a counter full of tools.
Use the equipment you already have for a week before buying anything else.
If a recurring problem appears, then solve that problem. Browse Meraki accessories only after you know what your workflow actually lacks.
How Do You Know the Transition Has Worked?
You have made the transition when the machine stops feeling like an experiment.
You know which bean is in the hopper. You know roughly where its grind setting lives. You can pull the shot, steam the milk and clean the machine without checking instructions every time.
At that point, espresso becomes less complicated than it seemed during the first morning.
Capsules offered consistency by removing your decisions. Home espresso becomes consistent when you learn which decisions actually matter.


