


You measured the chassis. The machine still “fits.” Then you purge the steam wand under a painted overhead cabinet and watch warm vapor hug the underside — or leave a faint haze on a fresh finish. Countertop espresso machine clearance and steam is not only width and depth. It is where heat and moisture go while you steam.
This Meraki guide owns kitchen planning for steam-wand zones: overhead cabinets, painted finishes, and a clearance checklist that protects surfaces without becoming a dry-steam product pitch or a general ventilation essay. Soft-link espresso machine clearance and ventilation for airflow and rear-gap rules; tall countertops clearance math for cup-height geometry; espresso machine for low cabinets for portafilter and hopper access; water spill protection for liquid spills (not vapor); and countertop espresso machine: choosing the right fit for overall fit. Soft-link dry steam: why it matters for steam quality in the cup — that page owns dryness and microfoam; this page owns where steam goes relative to cabinets and paint. Soft-name an integrated vs separate grinder space/cost card when station sprawl — not steam path — is the next blocker.
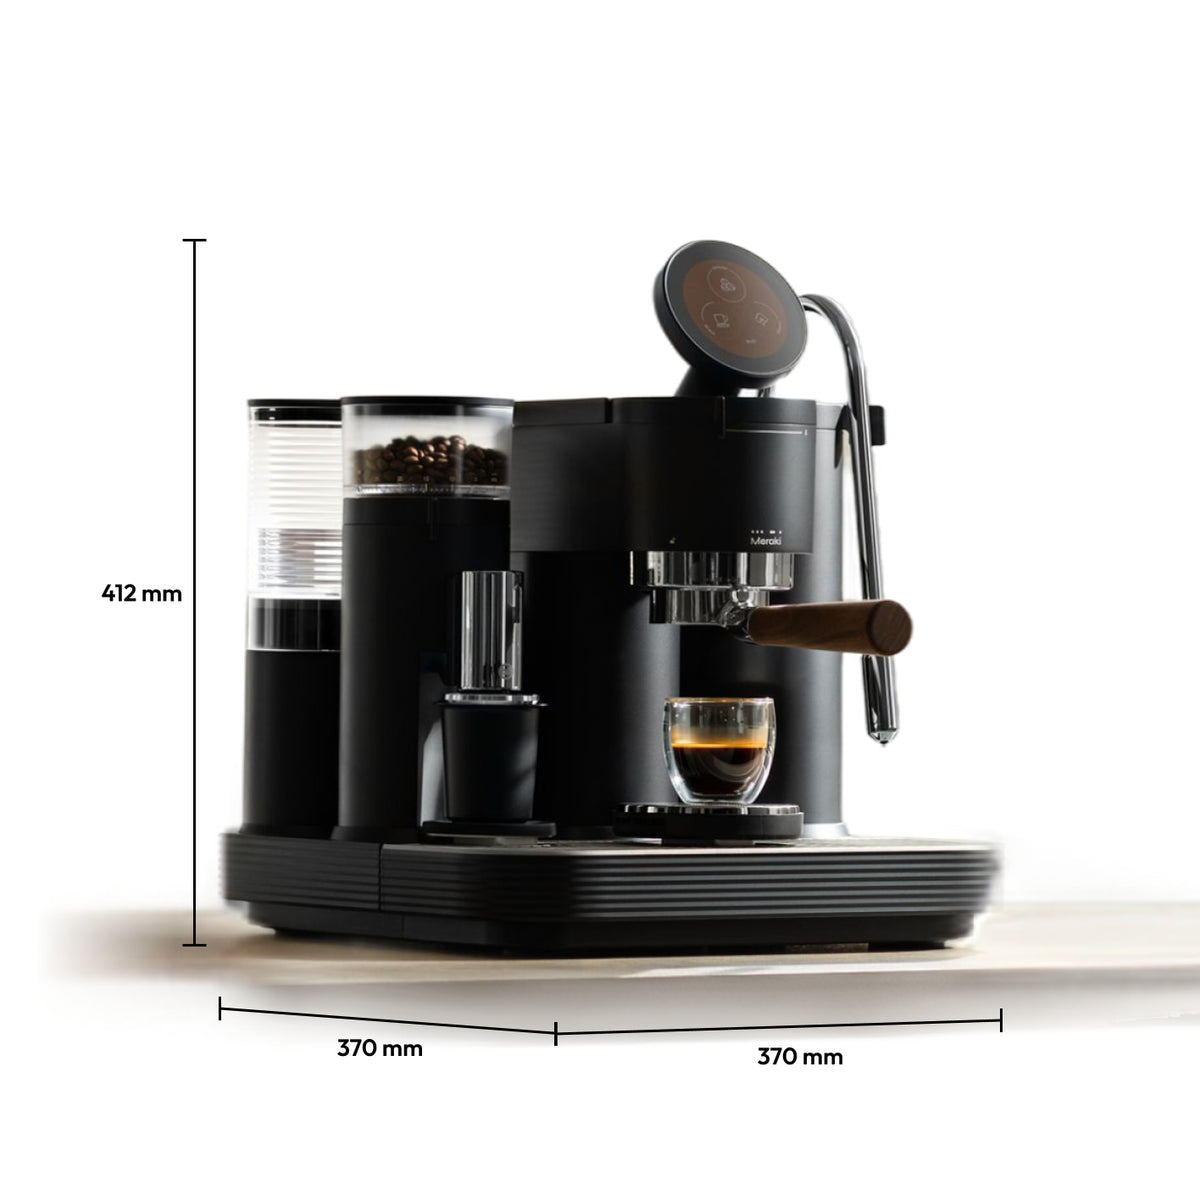
Chassis W × D × H is the start. Add overhead cabinet height, steam-wand swing, and vapor path before you call the pad “safe.”
What “countertop espresso machine clearance and steam” really means for home buyers
Countertop espresso machine clearance and steam, for kitchen planners, means the free space and finish protection around the steam wand and hot chassis — not only whether the box footprint fits the pad.
SERP for this phrase is noisy: marketplace “clearance” sales, compact-machine shopping cards, and best-of lists that mention mug clearance under a portafilter. Useful planners already know machines need room. What they still lack is a steam-and-heat planning card: how purge and steaming send vapor upward and sideways, how warm chassis air sits under low cabinets, and which painted or wood finishes are most exposed after weeks of milk drinks.
Treat clearance as three layers. Layer one is chassis footprint (published width × depth × height). Layer two is access (portafilter swing, hopper lid, cups). Layer three — this page — is steam path and heat soak: wand tip position, purge direction, pitcher height, overhead cabinet underside, side wall or backsplash finish, and a simple dry-run before the first latte. Soft-link ventilation and tall-counter math when those layers own the next click; stay here for steam-cabinet risk.
Who this page is for (and who should skip it)
This page is for kitchen planners and remodelers placing a countertop espresso machine under cabinets, beside painted panels, or against a finished backsplash — people who care whether steam and heat will mark finishes after daily milk drinks.
Skip clearance and ventilation when the open question is rear/side airflow inches only; tall countertops clearance math when cup height under a tall group is the blocker; low cabinets access test when portafilter lock-in under a shelf is the fear; spill protection when liquid water on toe-kicks and counters is the risk; and choosing the right countertop fit when you still need a general fit overview. Soft-link dry steam why it matters when steam texture — not cabinet safety — is the question. Soft-name integrated vs separate grinder ownership when the footprint debate is tool sprawl and upgrade cost, not vapor path. Come here for: steam/heat vs cabinets and painted finishes.
Why kitchen planning for steam and heat is the real fit problem
This article is published by Meraki. The unique job is kitchen planning: measure the pad, map the steam wand’s vapor path, then protect overhead cabinets and painted finishes — a clearance checklist for planners, not a dry-steam benefits essay.
That is not a ventilation-only guide, not tall-counter cup math, not a low-cabinet portafilter access test, not spill waterproofing, and not a general “right fit” overview. Soft-link those posts when their lane owns the next click; keep this page for steam-cabinet and finish risk.
Disclosure: Meraki sells the Meraki Espresso Machine — dual boilers, rotary pump framed near steady 9 bar, professional steam wand, built-in dual scales (±0.2 g), TIMEMORE® co-developed grinder, guided touchscreen. Live framing (2026-10-26/27): heat-up about 3–4 minutes; brew and steam together; published chassis about 370 × 370 × 415 mm (about 14.6 × 14.6 × 16.3 in) and weight about 14.5 kg (about 32 lb) — re-check the product page before treating numbers as permanent. No invented German Design / Red Dot claims here.
What to measure and prepare first
Kitchen planning fails when you only photograph an empty stretch of island. Prepare tools that prove steam path and heat soak — not tools that dial taste.
Have a tape measure (or laser), painter’s tape, a notepad or phone notes, a frothing pitcher at the height you actually use, and a clean cloth. Optional but useful: a cheap thermometer strip or IR thermometer for the underside of an overhead cabinet after a steam test (illustrative home check, not a lab certificate). Mark the intended pad with tape: chassis corners, wand side, pitcher landing zone, and the nearest cabinet edge above.
Record four numbers before you unbox or before you rearrange: (1) free counter width and usable depth; (2) clear height from counter to the underside of any overhead cabinet or shelf; (3) lateral space on the steam-wand side for pitcher tilt; (4) distance from expected wand tip to the nearest painted or wood vertical surface. Meraki’s published chassis is one worked example of footprint — your steam-path clearances sit outside that box. Soft-link tall countertops math if cup height under the group is still unknown; stay here once height is known and vapor under the cabinet is the worry.
Step-by-step: measure, test steam path, protect finishes
You do not need a remodel crew. You need a short workflow that survives brochure “compact” claims. Run it once on paper, then once with the machine (or a cardboard chassis mock-up of the same W × D × H) before daily milk drinks begin.
Step workflow — kitchen planning for steam and heat
- Tape the pad. Outline chassis W × D. Add a soft rectangle for pitcher, cups, and knock box so soft sprawl does not push the wand under a cabinet edge. Soft-name integrated vs separate grinder space/cost if a separate grinder would widen the station.
- Measure overhead clear height. From counter to cabinet underside. Compare to chassis height plus any hopper or lid travel. Soft-link low cabinets access if the portafilter cannot lock under the shelf — that page owns access; this step only flags whether vapor will sit under paint.
- Map the steam wand zone. With pitcher at real height, note where the tip points during purge and stretch. Prefer a purge that vents into open room air or toward the drip-tray side — not straight up into a painted underside or into a finished panel six inches away.
- Dry-run a steam path test. After the machine is safe to steam per its manual, purge briefly and steam a pitcher of water (or milk) once. Watch vapor: does it pool under the cabinet? Does it fog a side panel? Wipe any moisture immediately.
- Protect finishes that fail the test. Move the chassis forward or sideways a few inches if the pad allows; rotate the wand swing toward open space; add a small heat-tolerant mat only where the maker allows (never block required vents — soft-link ventilation clearance); consider a cabinet underside that is sealed or less porous if you are still designing the kitchen.
- Lock the station. Once vapor clears freely and no finish feels damp or hot after a short session, mark the pad and stop daily rearranging.
Electrical and appliance safety still matter — see UL and CPSC for consumer product safety framing. Soft-link dry steam why it matters when the next question is foam texture; keep this checklist for cabinet and paint exposure.
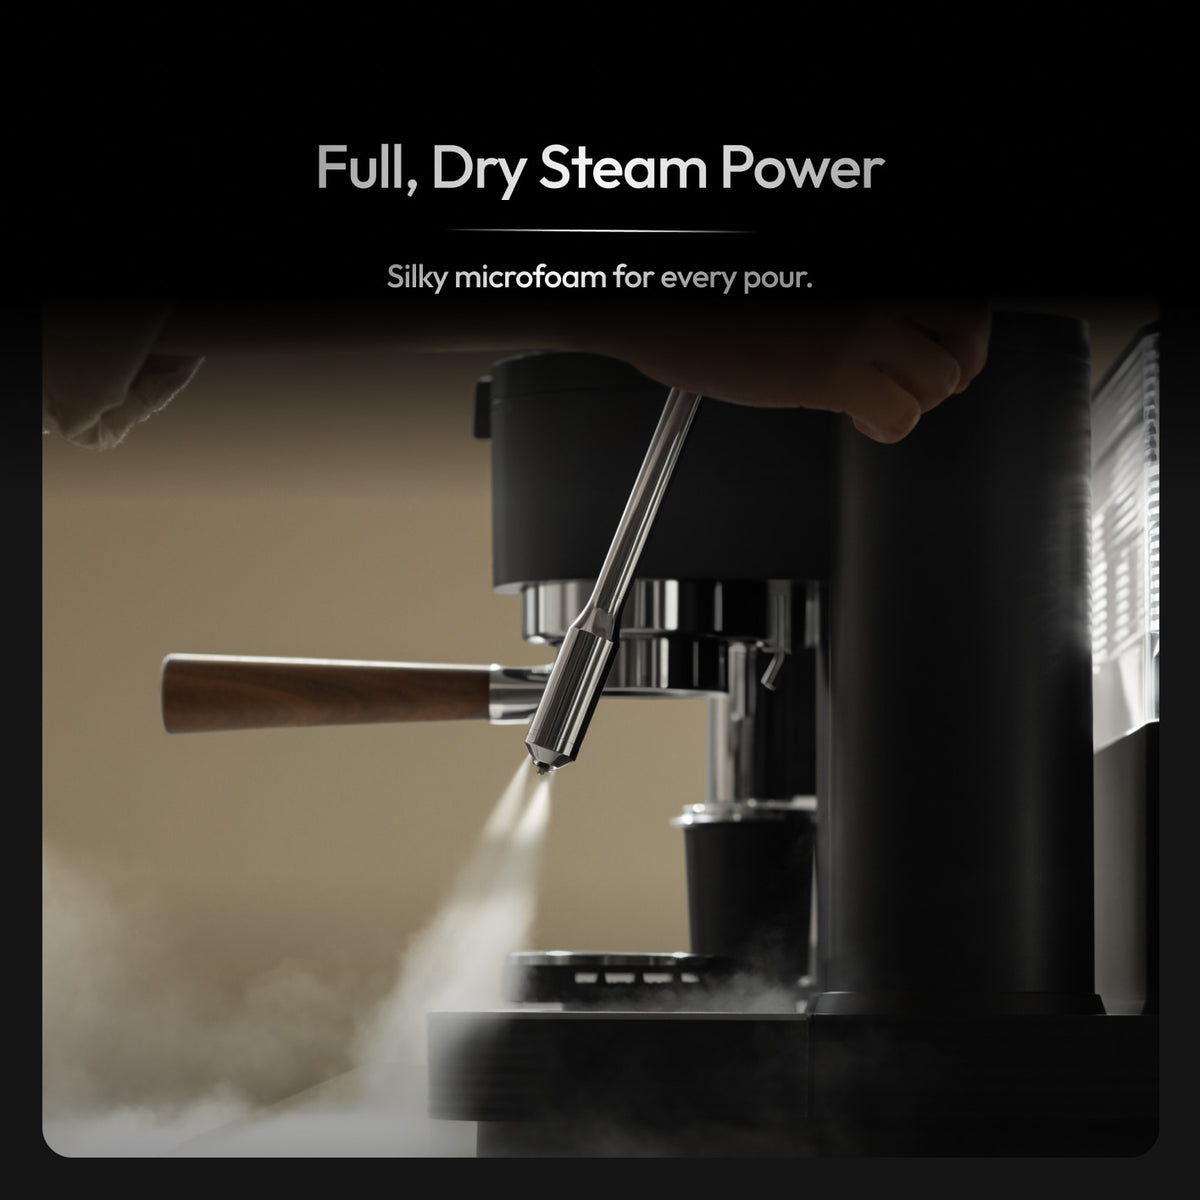
Steam wand power belongs in the pitcher — plan purge direction and overhead clear height so vapor does not soak painted cabinet undersides.
Clearance targets and ranges that keep you out of rabbit holes
Exact inches vary by maker, cabinet depth, and wand geometry. Treat the ranges below as planning defaults for kitchen planners, then confirm against your machine’s manual and your finish risk after a steam-path test. They are not a substitute for Meraki’s live product specs or a building code.
| Zone | Planning default to start with | What “fail” looks like |
|---|---|---|
| Chassis pad | Published W × D × H + soft tool landing | Machine “fits” but pitcher forces wand under cabinet |
| Overhead clear height | Chassis height + hopper/lid travel + breathing room for vapor | Warm/damp underside after steaming; paint haze |
| Steam-wand lateral space | Pitcher tilt arc without hitting wall or appliance | Tip vents into a painted panel or corner |
| Wand-to-cabinet underside | Prefer open air above the tip during purge | Purge aimed straight up into cabinet paint |
| Rear / side airflow | Follow maker ventilation guidance | Soft-link ventilation page — do not seal a dual boiler in a cubby |
| Finish watch list | Fresh paint, raw wood, matte cabinets near wand | Soft white film, swollen edge banding, sticky feel |
Meraki’s published footprint (~14.6 × 14.6 × 16.3 in) is one example of layer-one geometry. Layer-three steam clearance is yours to prove on site. Category literacy from the Specialty Coffee Association and CoffeeGeek guides still starts with drink quality; NIST is a reminder that trust grows when you can re-measure — here, re-measure vapor path after you change the pad, not only chassis width once.
Common mistakes and quick fixes
Most steam-cabinet problems come from planning the photo, not the purge. Fix the habit before you blame the wand.
Mistake: Buying on chassis width alone. Fix: Tape the pad and run the steam-path test before guests arrive.
Mistake: Parking the machine fully under a low painted cabinet “to hide clutter.” Fix: Pull the chassis forward so purge vents into open air, or relocate the station to an open stretch. Soft-link low cabinets access if the real blocker is portafilter swing, not vapor.
Mistake: Aiming the purge tip upward as a habit. Fix: Purge into the drip tray or into open room space with the tip angled away from finishes, per safe wand practice in your manual.
Mistake: Treating vapor like a spill. Fix: Soft-link spill protection for liquid water; wipe vapor moisture promptly, then change geometry so moisture stops forming under paint.
Mistake: Blocking rear vents with a “protective” board against the backsplash. Fix: Soft-link ventilation clearance; protect finishes without sealing heat exits.
Mistake: Comparing all-in-one pad photos to a bare dual boiler that still needs a separate grinder. Fix: Soft-name integrated vs separate grinder space/cost and draw both stations before you celebrate a narrow chassis.
How to judge finish risk after a steam-path test
Taste is not the metric here. After one controlled steam session, judge the station, not the latte.
Feel the underside of the overhead cabinet: warm is common near any hot appliance; damp or sticky is a fail. Look for fogging on a side panel or backsplash finish within arm’s length of the tip. Smell for a “hot paint” note that was not there before steaming. Wipe with a clean dry cloth — if the cloth picks up moisture from the cabinet underside, move the pad or change purge direction before daily use.
If finishes pass but milk texture fails, soft-link dry steam why it matters and keep this page closed. If access fails under a shelf, soft-link the low-cabinets access test. If liquid pooling on the counter is the issue, soft-link spill protection. NCA brewing basics and About Coffee brewing still help once the station is safe; finish risk comes first for planners.
A one-week kitchen-station habit plan
Use one week to prove the pad — not to chase latte art. Keep drinks simple so the station, not skill, is under test.
Day 1–2: Tape pad, record the four measurements, confirm outlet path and ventilation soft-link rules. Day 3: First steam-path test with water in the pitcher; photograph cabinet underside before/after if helpful. Day 4: Adjust chassis position or wand habit; re-test once. Day 5–6: Make your normal milk drink once each morning without moving the machine; wipe the wand and any nearby finish after. Day 7: Decide: keep the pad, move permanently, or change cabinet/finish plans if you are still in remodel. Soft-name a weekday morning routine card when timing — not steam-cabinet risk — becomes the next habit to lock.
Energy use of a dual-boiler morning is usually modest next to beans — see energy.gov for home energy context — but heat still concentrates under tight cabinets. The week’s job is geometry and finish hygiene, not roasting theory.
When to stop rearranging and just brew
Stop rearranging when vapor clears into open air, no nearby finish feels damp after a normal steam, portafilter and hopper access still work, and soft tools have a home that does not shove the wand under paint. Further shuffling usually means anxiety, not new information.
If the only “fix” left is buying a different machine class for a separate grinder triangle, soft-name integrated vs separate grinder space/cost once — then decide. If steam quality in the cup is still thin, soft-link dry steam literacy. If you only need a general countertop fit overview, soft-link choosing the right fit. When kitchen planning for steam and cabinets is done, brew.
Compare Meraki’s live dual-boiler and steam framing on the Meraki Espresso Machine product page when an all-in-one pad is the goal — then prove the steam path under your cabinets before the first guest latte.
FAQ
How much clearance do I need above a countertop espresso machine for steam?
Start with chassis height plus hopper or lid travel, then add breathing room so purge vapor is not trapped against a painted cabinet underside. Exact inches depend on wand angle and cabinet depth — run a short steam-path test and check for dampness or haze. Soft-link Meraki’s ventilation clearance guide for rear/side airflow; use this page for overhead steam and finish risk.
Can steam from an espresso machine damage painted cabinets?
Repeated warm vapor and moisture against fresh or matte paint can leave haze, sticky feel, or edge issues over time — especially when purge aims upward into a low underside. Wipe moisture promptly, redirect the wand, or pull the chassis forward so vapor vents into open air. This is finish hygiene, not a claim that every kitchen will fail.
Is dry steam the same as safe clearance under cabinets?
No. Dry steam is about steam quality and milk texture in the cup. Clearance under cabinets is about where heat and moisture go relative to finishes. Soft-link Meraki’s dry-steam guide for foam quality; keep kitchen planning here for steam-wand zone geometry and paint protection.
Should I put a board or cover under the overhead cabinet?
Only if it does not block required machine vents or create a heat trap, and only with materials appropriate for kitchen heat and moisture. Many planners do better by moving the pad or changing purge direction first. Never seal a dual-boiler rear exhaust — soft-link the ventilation clearance article before you add DIY covers.
What Meraki dimensions should I use for pad planning?
As checked around 2026-10-26/27, Meraki lists about 370 × 370 × 415 mm (about 14.6 × 14.6 × 16.3 in) and about 14.5 kg (about 32 lb) on the product page — verify live before you buy. Those numbers are chassis footprint only; add steam-wand lateral space, overhead clear height, and soft tool landing for a real kitchen plan.


