


The machine is on the counter, the first shot looks thin, and every “best for beginners” tab is suddenly useless — you already bought something; you need a week, not another ranking. An espresso machine for beginners first week plan only helps as a day-by-day curriculum: setup confidence → first drinkable shots → milk intro → guest-ready checklist → week-one mistakes — not a rewrite of “which machine to buy.”
This Meraki guide is that week-one onboarding plan. It is not a beginner buyer guide (which machine is best, what to look for, jargon-light buyer’s guide), not 30-minute unboxing, not capsule-culture first week with Meraki, not the home espresso encyclopedia, and not a 30-day guided month syllabus. Use those for their jobs; use this page for Days 1–7 only.
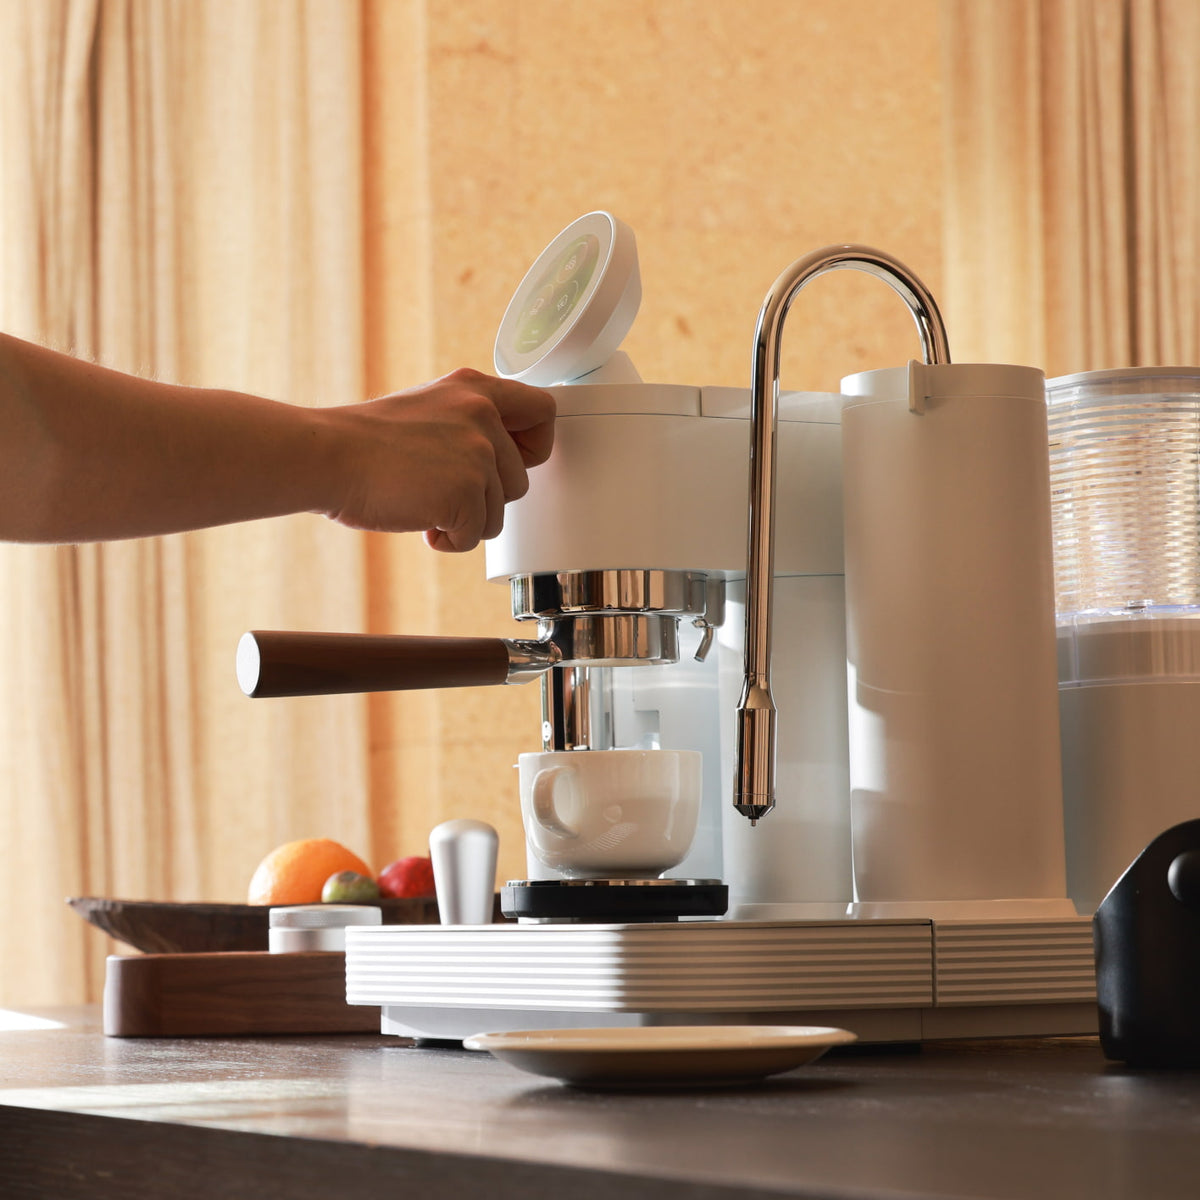
Week one is a curriculum: finish the loop every morning — not seven days of shopping for a “better” beginner machine.
What “espresso machine for beginners first week plan” really means for home buyers
“Espresso machine for beginners first week plan” in search often lands on best beginner machine roundups, under-$400 shopping chips, or “starter kit” affiliate lists. For a home buyer who already has (or is about to unbox) a real espresso setup, the phrase means something narrower: a seven-day learning plan that turns fear into a repeatable weekday loop before guests, forums, or grind tourism take over.
Week one, here, means completion and confidence — warm fully, lock one drink, hit honest dose and yield, taste once, introduce milk on its own day, then prove you can host without a lecture. It does not mean mastering latte art, walking every grind click, or rewriting targets every sunrise.
Treat the keyword as onboarding curriculum for Days 1–7. Buyer pages own pre-purchase. Unboxing owns the first half hour. Capsule-to-craft owns culture shock for capsule leavers. A longer guided month owns Weeks 2–4. This page owns week one only.
Who this page is for (and who should skip it)
This page is for absolute beginners and careful new owners who want a day-by-day first week plan — not another “what to buy” essay.
Skip shopping (best for beginners, what to look for, jargon-light buyer’s guide), unboxing, capsule culture shock (From Capsules to Craft), the home espresso encyclopedia, the long 10 mistakes catalog, and any full first-month guided syllabus (that starts after Day 7). Come here when the question is: how do I spend Days 1–7 without thrashing every setting?
Why this is a week-one curriculum (not a best-for-beginners rewrite)
SERP for this query leans toward beginner buying listicles — “7 picks,” “3 paths,” “best under $X.” Meraki already covers shopping, unboxing, capsule transitions, and full beginner brewing. What stays thin is a Days 1–7 curriculum that assumes the box is open and answers what to practice each morning.
The unique job: setup confidence, first drinkable shots, milk on a separate day, a guest-ready checklist, and week-one mistake control — without expanding into Weeks 2–4. Disclosure: Meraki publishes this guide and sells the Meraki Espresso Machine. Live product story (2026-10-26 snapshot + homepage): guided touchscreen, dual boilers (warm-up about 3–4 minutes per product FAQ), commercial rotary pump framed at steady 9 bar, true burr grinder co-developed with TIMEMORE® that grinds onto the built-in scale, dual scales 1 kg · ±0.2 g, auto-stop at target yield, and Grind → Dose → Brew → Steam. Meraki examples illustrate one verified path — not a ranking of every brand.
Tools and settings to prepare first
Week one fails when Day 1 starts mid-chaos. Before this curriculum’s Day 1, finish physical setup with the 30-minute unboxing walkthrough: water, fresh beans, clean portafilter/basket, tamp tools you will use, a pitcher if you drink milk drinks, and a knock spot.
Write three sticky notes for seven days: (1) one weekday drink, (2) one bean bag, (3) “change one thing only — and not yet.” On Meraki’s framing, dual boilers heat in about 3–4 minutes — confirm on the live product page — so stage tools during warm-up. Capsule leavers can keep From Capsules to Craft nearby for culture shock; this spine still fits any absolute beginner.
Category literacy from the Specialty Coffee Association and CoffeeGeek’s guides beats “master espresso in three days.” Fresh beans and honest weighing beat accessory shopping — timing extras lives on first espresso accessories.
Step-by-step workflow: your first week on a beginner espresso machine
The weekday win in week one is a boring sequence you can finish before work — not a new theory every morning. Use this day-by-day plan. Stay inside Days 1–7; after Day 7, graduate into a longer guided month curriculum when you want Weeks 2–4 — do not invent month-two labs here.
Day 1 — Setup confidence; finish one guided loop
- Warm fully. Meraki’s FAQ lists about 3–4 minutes; re-check your unit.
- Pick one sticky drink for the week. Espresso, latte, cappuccino, flat white, or americano on Meraki’s guided café framing — choose one and stop shopping for a “better” first cup. If milk is the goal drink, still learn the espresso base before Day 5 steam experiments.
- Accept guided / default dose and yield. Let grind-by-weight and yield auto-stop work. No second recipe tonight.
- Run Grind → Dose → Brew → Steam (or stop after Brew if espresso-only). Same distribute/tamp. Taste once; one word (sour / bitter / thin / sweet / fine).
- Refuse grind tourism. Day 1 owns completion.
Goal: you know where water, beans, portafilter, and the knock box live — and you finished one loop.
Day 2 — First drinkable shots (same targets)
Same bean, dose, and yield. Warm, tare/zero, grind-by-weight, brew to the stop, taste once. Pull two procedurally identical drinks — not café perfection. Wrong cup → write the word; do not change grind yet. NIST reminds you a scale is only as honest as its zero. Yield depth waits on the brew-by-weight complete guide; today you practice trusting the stop.
Day 3 — Same hands; lock the weekday sequence
Identical distribution/tamp. Prep during warm-up. Trust auto-stop. If one side blondes, fix distribution next shot — do not rewrite dose mid-pour. Full dial-in lives on dose and yield; week one only asks for a fair puck.
Day 4 — Taste vocabulary (still no dial tourism)
No setting changes. Force three words: body, acidity, finish. Sour-fast and harsh-slow are notes for later. NCA and SCA research still apply: extraction is dose, grind, yield, time, and prep together — collect evidence; do not rebuild the lab.
Day 5 — Milk intro (separate from espresso experiments)
Keep espresso targets sticky. Steam after a trusted shot — not both variables at once. Meraki frames powerful dry steam and Auto Temp Stop / milk-sensor on the measured path; confirm live wording on the product page. Texture basics live on how to steam and texture milk. Purge, wipe, stay hygienic (FDA safe food handling).
Day 6 — Guest pace; two drinks in a row
Run the sticky loop twice without screen narration. Goal: two cups before the conversation dies. Calm-home context shows up in places like Barista Magazine; still judge your kitchen clock.
Day 7 — Guest-ready checklist; lock the week
Run the checklist below once. Clean basket path and scales. Refuse bonus experiments when the cup was fine. Write what stays sticky: drink, dose, yield, grind as left. After Day 7, graduate into a longer guided month curriculum if you want Weeks 2–4 — do not expand this page into that syllabus.
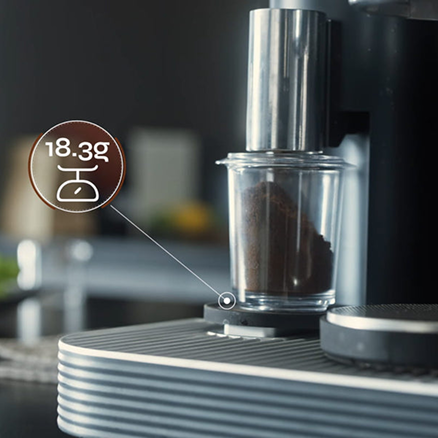
Week-one confidence: target dose on the scale, then the same hand sequence — not seven mornings of reinventing grams.
Targets and ranges that keep you out of rabbit holes
Targets give Days 1–7 a spine. Prefer one weekday dose, one yield, one drink, and ranges — not laboratory precision.
Many homes start near a familiar ~1:2 brew-ratio habit (for example ~18 g in → ~36 g out) — café-culture baseline, not a law. That “2:1” idea is a starting lane; when to break it lives on espresso ratio explained. Meraki’s guided café framing also uses latte ~1:3 and cappuccino / flat white ~1:2 as menu language — confirm on the live product page. Extraction time is a traffic light (mid-twenties into low thirties of seconds is a common home band). Dual boilers + rotary pressure framed at steady 9 bar are not week-one knobs. Scales to ±0.2 g keep dose and yield honest — not a license to chase hundredths before you can name sour vs bitter.
Days 1–7 decision table
| Moment | Do this | Do not do this yet |
|---|---|---|
| Day 1 | Finish one guided loop; sticky drink + targets | Grind tourism; multi-drink menu |
| Days 2–3 | Same dose/yield; same hands | Changing grind and dose together |
| Day 4 | Taste words only | “Fixing” from a forum chart |
| Day 5 | Milk as a separate lesson | Redesigning espresso mid-steam |
| Days 6–7 | Guest pace; lock checklist | Starting a second bean “for science” |
| After Day 7 | Longer month curriculum if you want it | Pretending week one must include Weeks 2–4 |
Common mistakes and quick fixes
Most “my beginner machine feels random in week one” complaints are curriculum errors, not broken hardware. For a longer catalog, use Meraki’s 10 espresso mistakes page — this table is week-one only.
| Week-one mistake | What you feel | Quick fix |
|---|---|---|
| Rewriting targets every morning | No baseline; “the machine is random” | Sticky-note one dose + yield for seven days |
| Skipping warm-up | Thin first shot; blame the UI | Wait for ready; prep during 3–4 min warm-up |
| Changing grind and dose together | No idea what worked | Freeze dose/yield; notes only until Day 8+ |
| Milk experiments on Day 1–2 | Never learn the espresso base | Milk on Day 5; espresso sticky first |
| Forum dial-in before Day 4 habits | Anxiety + wasted beans | Finish two identical loops first |
| Confusing week-one plan with shopping | More tabs, fewer cups | Buyer guides wait; this page assumes the box is open |
| Hosting on Day 2 | Performing under stress | Guest-ready is Day 7; practice Days 1–6 alone |
If the cup still disagrees after dose and yield are honest, jump to Meraki’s deeper dose and yield method — do not invent a second week-one curriculum here.
How to taste and decide what to change next
In week one, taste answers two questions: Did measured targets land? and Is the cup wrong in a nameable way? Missed dose/yield → fix tare and prep before grind. Targets landed but cup wrong → name it once (sour-fast → finer later; harsh-slow → coarser later; muddy “perfect” grams → distribution). Under milk (Day 5+), ask whether espresso still tastes like coffee once diluted.
Change zero recipe variables on Days 1–4. From Day 8 onward — outside this page — change one variable per block, usually grind. Keep a three-line note: date · target hit? · one taste word.
A one-week practice or habit plan
Same Days 1–7 spine as a habit card — same beans, same sticky drink:
| Day | Habit focus |
|---|---|
| 1 | Guided completion; one taste word; no dial tourism |
| 2 | Two identical shots; trust dose/yield stops |
| 3 | Same hands; quieter than anxiety |
| 4 | Taste vocabulary only (body / acidity / finish) |
| 5 | Milk intro after a trusted base; purge and wipe |
| 6 | Guest pace; two drinks in a row |
| 7 | Guest-ready checklist; lock sticky settings |
Do not skip warm-up to “save power” and blame a cold first shot — home espresso energy is usually modest next to beans (energy.gov).
Guest-ready checklist (Day 7)
- Water filled; drip tray and knock box manageable.
- Sticky dose and yield still visible.
- Warm fully — no cold “quick” guest cup.
- Two practice drinks at guest pace (Day 6).
- Pitcher clean/dry if milk is on the menu; wand purged and wiped.
- A rinse ritual between drinks.
- A calm line beats mid-host dial panic: “Week-one recipe — still learning.”
When to stop tweaking and just drink
Stop when the weekday loop is automatic, dose and yield land without drama, and further changes would only serve curiosity. Week one is a learning scaffold, not homework to visit every menu item before Day 7. Protect sticky targets on one roast. After Day 7, rotate beans only when you will reconfirm dose and taste — not because a forum said “fine-tune on day six.” Shopping and unboxing pages wait for their moments. Your job at Day 7 is a quiet cup you trust.
How to make a shot of espresso with a coffee maker?
You usually cannot make true espresso on a regular drip coffee maker.
Drip, pour-over, and most “espresso-style” pod or pressurized basket gadgets do not combine fine grind, high pressure, and short contact time the way espresso machines do. A beginner espresso machine (semi-automatic, dual-boiler all-in-one, or similar) is the tool for a real shot: dose → fine grind → tamp → brew under pressure to a target yield. If you only own a drip maker, brew great filter coffee — or plan a real espresso setup — rather than forcing espresso physics through the wrong appliance. Meraki’s beginner home espresso guide owns the full variable chain; this page only needs the honest boundary for week one.
What is the best espresso starter kit for beginners?
There is no single “best” kit — start with machine + fresh beans + basic prep tools, then add accessories as habits stick.
A useful week-one kit is boring: a machine that can weigh or at least help you weigh dose and yield, fresh whole beans, a tamp/distribution path you will actually use, a knock box or sturdy knock habit, and a pitcher if you drink milk drinks. Meraki’s product FAQ frames the Meraki Espresso Machine as beginner-friendly with a guided touchscreen and built-in scales, and states you do not need a separate grinder or scale because both are in the system — verify live wording and what ships in the box on the product page the day you buy. Extra tools can wait; Meraki’s first accessories guide and accessories collection own shopping order. This page will not invent a ranked “best starter kit” listicle.
FAQ
What is the 2:1 rule for espresso? It is a common home starting ratio: about twice as much liquid out as dry coffee in (for example ~18 g in → ~36 g out). Treat it as a habit lane for week one, not a law every great shot must obey. Lock dose and yield near a familiar ~1:2 while you learn the machine; change ratio on purpose later with Meraki’s ratio explained guide — not on Day 2 because a forum said so.
Is it worth buying a cheap espresso machine? Sometimes — if “cheap” still means a real pump espresso path, a workable grinder (built-in or separate), and tools you will weigh with. A bargain that cannot hold pressure, dose, or a repeatable grind often costs more in beans and frustration. This page does not rank models or invent a winner; use Meraki’s beginner buyer pages when you are still shopping, and use this curriculum when the box is open. Meraki’s own machine sits in a guided all-in-one tier — disclose that we sell it, and compare on live specs, trial, and warranty rather than a fake universal “best cheap” award.
Does this replace Meraki’s capsule-to-craft first week? No. From Capsules to Craft owns capsule culture shock and Meraki-specific transition feelings. This page is the broader absolute-beginner Days 1–7 curriculum (any beginner path), with shopping, unboxing, and month-long guided study left to their own pages.
When should I change grind in week one? Prefer notes on Days 1–4. If a shot is wildly undrinkable after targets landed and prep was fair, one small grind step on Day 5–7 is allowed — then wait two drinks. Do not change grind and dose together. Deeper dial-in waits until after Day 7.
Is week one the same as Meraki’s 30-day home trial? No. This page is a seven-day learning plan. Meraki’s 30-day home trial / refund terms are a purchase policy — read the live refund policy. Do not thrash every setting to “use up” a trial; calm repetition teaches faster than panic experimentation.
If your goal is a calm first week on a beginner home espresso machine, run the day-by-day plan above — and confirm today’s Meraki guided touchscreen, dual boilers (~3–4 minutes warm-up), rotary pump (steady 9 bar), TIMEMORE® co-developed grind-to-scale path, dual scales (1 kg · ±0.2 g), and Grind → Dose → Brew → Steam framing on the Meraki Espresso Machine product page when you want the guided all-in-one path. Support: Meraki Support (+1 833 854 9555, Mon–Fri 9 AM–5 PM EST).


